Chapter 19 / 28
AppRole Authentication Method: Vault Meets Automation
HashiCorp Vault For Beginners15 min read
So far, we've operated Vault entirely through human interactions—logging in with tokens, enabling secret engines, and setting policies manually. But in a real-world production environment, this model doesn’t scale. Services, applications, CI/CD pipelines, and background workers need a secure way to authenticate with Vault without human intervention.
That’s where AppRole comes in.
AppRole is a secure and flexible authentication method tailored for machines. It provides a way for applications to authenticate to Vault and receive a token with tightly scoped permissions. Unlike static tokens, AppRole uses two distinct pieces of information—Role ID and Secret ID—to authenticate. This separation of credentials reduces the risk of unauthorized access.
Why AppRole?
Before diving into the implementation, let’s understand the use case for AppRole:
- A CI/CD pipeline needs to pull secrets from Vault to deploy services.
- A containerized microservice needs credentials to connect to a database.
- A backend job needs a time-limited token to access sensitive configuration.
In each of these scenarios, there’s no human in the loop. AppRole enables secure, programmatic authentication by issuing short-lived tokens—perfect for automation.
Concepts Behind AppRole
There are a few new terms you'll want to become familiar with:
- Role ID: A static identifier assigned to the AppRole. Think of it as the username.
- Secret ID: A short-lived, limited-use credential that acts like a one-time password. That means:
- It has a time-to-live (TTL), after which it becomes invalid.
- It can be configured to only be used a certain number of times.
- It helps enforce tighter security, especially in automated environments.
- AppRole Token: A Vault token issued after a successful authentication using the Role ID and Secret ID.
You can also fine-tune behaviors such as:
- Token TTL
- Token usage count (via
num_uses) - CIDR-bound usage (IP whitelisting)
- Secret ID lifecycle (e.g., automatic rotation or manual generation)
Let’s walk through configuring and using the AppRole authentication method in Vault.
In this example, we’ll set up a microservice that uses the AppRole authentication method to identify itself and retrieve database credentials. To keep things simple, we’ll fetch a static secret from the KV v2 secrets engine instead of using dynamic credentials—which we’ve already covered. The overall process remains nearly the same for both types of secrets.
Step 1: Prepare Vault Using Docker Compose
Let’s start our vault container by running the below command.
docker run -d --rm \
  -p 8200:8200 \
  -v $(pwd)/vault-data/config:/vault/config \
  -v $(pwd)/vault-data/file:/vault/file \
  -v $(pwd)/vault-data/logs:/vault/logs \
  -v $(pwd):/home/vault/vault-beginner \
  --cap-add=IPC_LOCK \
  --name vault-dev \
    hashicorp/vault:latest server
Step 2: Attach to the Vault Container
docker exec -it vault-dev /bin/sh
Inside the container, set the Vault address in env variable:
export VAULT_ADDR='http://127.0.0.1:8200'
Step 3: Unseal the Vault
Vault is sealed by default for security. To unseal it, you need to provide at least three unseal key shares from the initialization step in Chapter 3.
Run the following command three times, each time providing one unseal key when prompted:
vault operator unseal
Paste a different unseal key each time. After the third key, Vault will be unsealed and ready to use.
Step 4: Login to Vault
Login as root
vault login <your-root-token>
(Replace <your-root-token> with your actual root token you have received when you performed the vault operator init.)
Step 5: Enable KV v2 at a Custom Path
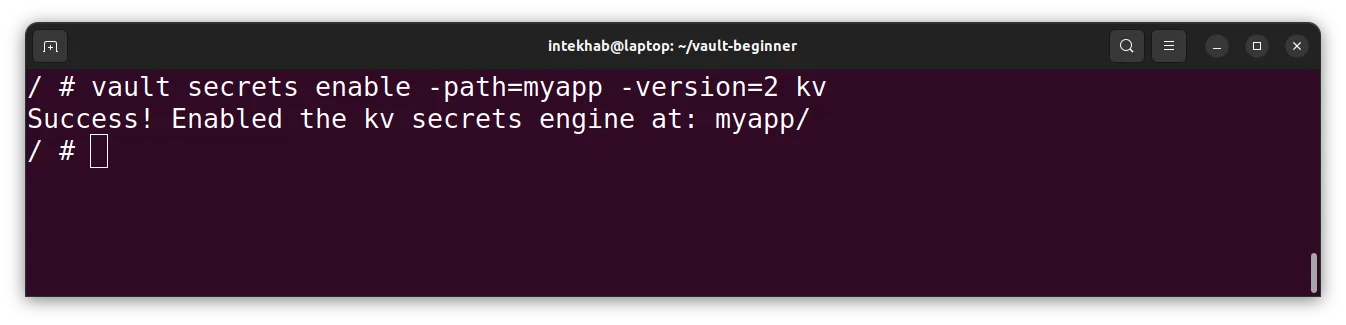
Let’s first enable the KV v2 secrets engine at a custom path named myapp.
vault secrets enable -path=myapp -version=2 kv
You should see the success message like below.
Now store a dummy database credential that your microservice will eventually read.
vault kv put myapp/webapp/dbcreds \
  username="app_user" \
  password="SuperSecret123"
Step 7: Create a Vault Policy
We’ll now create a policy that allows read access to only this secret path.
Create a policy file myapp.hcl with this content:
path "myapp/data/webapp/dbcreds" {
  capabilities = ["read"]
}
Before applying the policy, make sure you're inside the main project directory,
vault-beginner. This ensures Vault can access the policy file stored in the correct folder structure.
Navigate to the project directory where the myapp.hcl policy file is located:
cd /home/vault/vault-beginner
This is the location where we’ve already placed the policy file for you.
Apply the policy:
vault policy write myapp-reader chapter-19/myapp.hcl
Step 8: Enable AppRole Authentication
If AppRole is not already enabled, enable it:
vault auth enable approle
Step 9: Create the AppRole and Bind the Policy
Create a new AppRole and associate it with the reader policy we have just created. This will give the read only permission on our store secrets on myapp/webapp/dbcreds path.
vault write auth/approle/role/myapp \
  token_policies="myapp-reader" \
  secret_id_ttl=60m \
  token_ttl=20m \
  token_max_ttl=60m \
  secret_id_num_uses=5
Let’s break it down:
auth/approle/role/myapp: This is the path under which the AppRole is registered.token_policies: The name of the Vault policy that this role’s token will inherit.token_ttl: How long the token will live by default.token_max_ttl: The maximum lifetime of the token.secret_id_ttl: The validity period of the Secret ID.secret_id_num_uses: This Secret ID can only be used 5 times.
Now that the AppRole authentication is set up, any application can authenticate and retrieve the stored credentials. The next step is to generate a Role ID and Secret ID—these act like the username and password for your application. With them, the application can authenticate to Vault and fetch the secrets it needs.
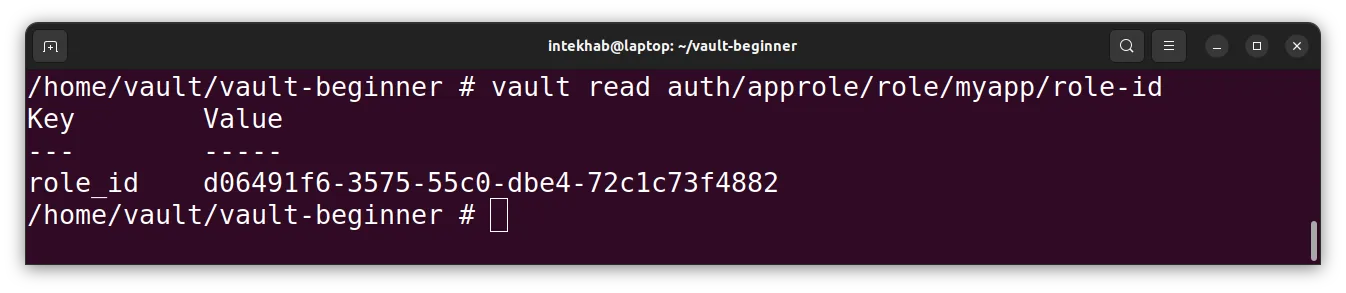
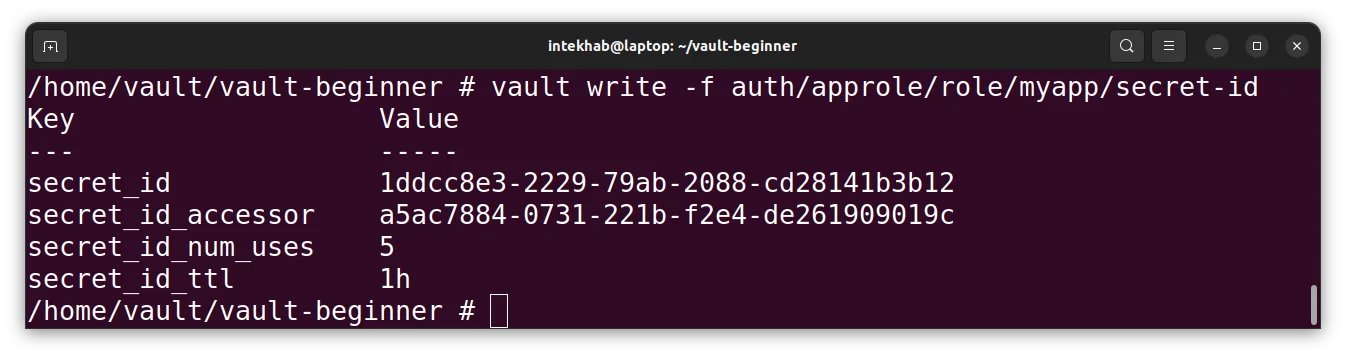
Step 10: Fetch Role ID and Secret ID
The microservice needs these to log in.
# Get Role ID
vault read auth/approle/role/myapp/role-id

# Generate a Secret ID
vault write -f auth/approle/role/myapp/secret-id
You’ll see an output similar to the one below. Make sure to copy and save both the role_id and secret_id — we’ll need them in the next steps.\
You're now fully set up on the Vault side and ready for a test run. In this step, we’ll deploy a pre-built Python-based microservice that connects to Vault using the AppRole authentication method. The service will:
- Send its Role ID and Secret ID to Vault.
- Authenticate and receive a Vault token.
- Use that token to retrieve the secret we stored earlier in the
kv-v2path.
To keep things simple and streamlined, we’ll stop the standalone Vault container and launch both Vault and the microservice using Docker Compose. This automatically creates a shared network between the containers, allowing them to communicate seamlessly—no extra manual setup required.
Let’s get started.
Step 11: Stop the vault standalone container
To stop the vault standalone container, run the below command :
docker stop vault-dev
Step 12: Configure and start the microservice
To start both containers using Docker Compose and ensure they can talk to each other, follow these steps:
First, navigate to the chapter-19 folder of your project:
cd vault-beginner/chapter-19
Inside this folder, you'll find a file named docker-compose.yaml. Open it in your preferred editor.
Locate line 27 and 28, where you’ll see placeholder values:
ROLE_ID: <<WRITE_YOUR_ROLE_ID>>
SECRET_ID: <<WRITE_YOUR_SECRET_ID>>
Replace these placeholders with the actual role_id and secret_id that you generated earlier.
Once updated, save and close the file. You’re now ready to spin up both containers with proper networking using:
docker-compose up
This will boot both Vault and the microservice, with environment variables injected and internal networking already handled for you.
Step 13: Attach to the Vault Container
Run the following command to attach to the Vault container:\
docker exec -it vault-dev /bin/sh
Inside the container, set the Vault address in env variable:
export VAULT_ADDR='http://127.0.0.1:8200'
Step 14: Unseal the Vault
Whenever Vault is restarted, it automatically seals itself for security. Before our microservice—or any service—can access secrets, we must unseal Vault first. To unseal it, you need to provide at least three unseal key shares from the initialization step in Chapter 3.
Run the following command three times, each time providing one unseal key when prompted:
vault operator unseal
Paste a different unseal key each time. After the third key, Vault will be unsealed and ready to use.
For the curious minds
If you're interested in what’s happening behind the scenes at the microservice level, I’ve included the Python source code in the file namedmicroservice.pyinside thechapter-19folder. I highly recommend giving it a read to better understand how the microservice authenticates with Vault, handles the token, and retrieves secrets.
Step 15: Testing the microservice
Now that both the Vault and microservice containers are up and running—and Vault has been unsealed—it’s time to test if everything is working correctly.
Open your browser or any API client of your choice and navigate to:
http://localhost:8000/
You should see a JSON response displaying the credentials we stored earlier in Step 6.
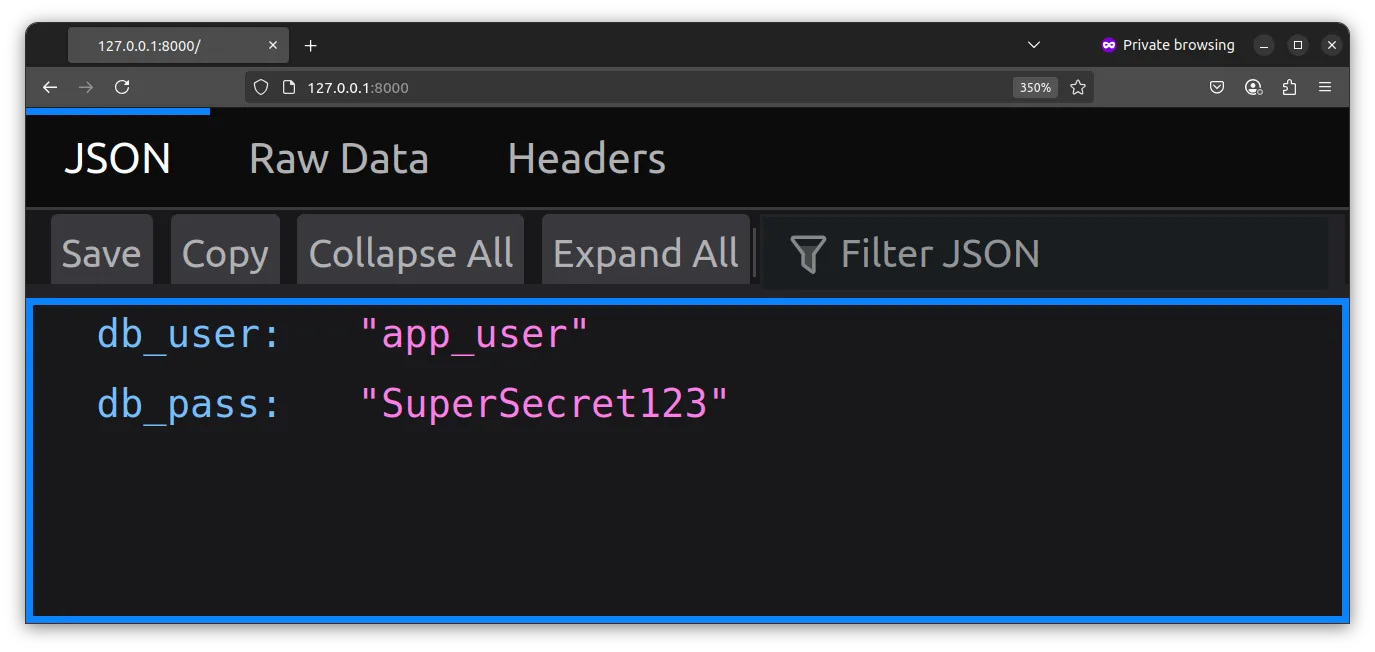
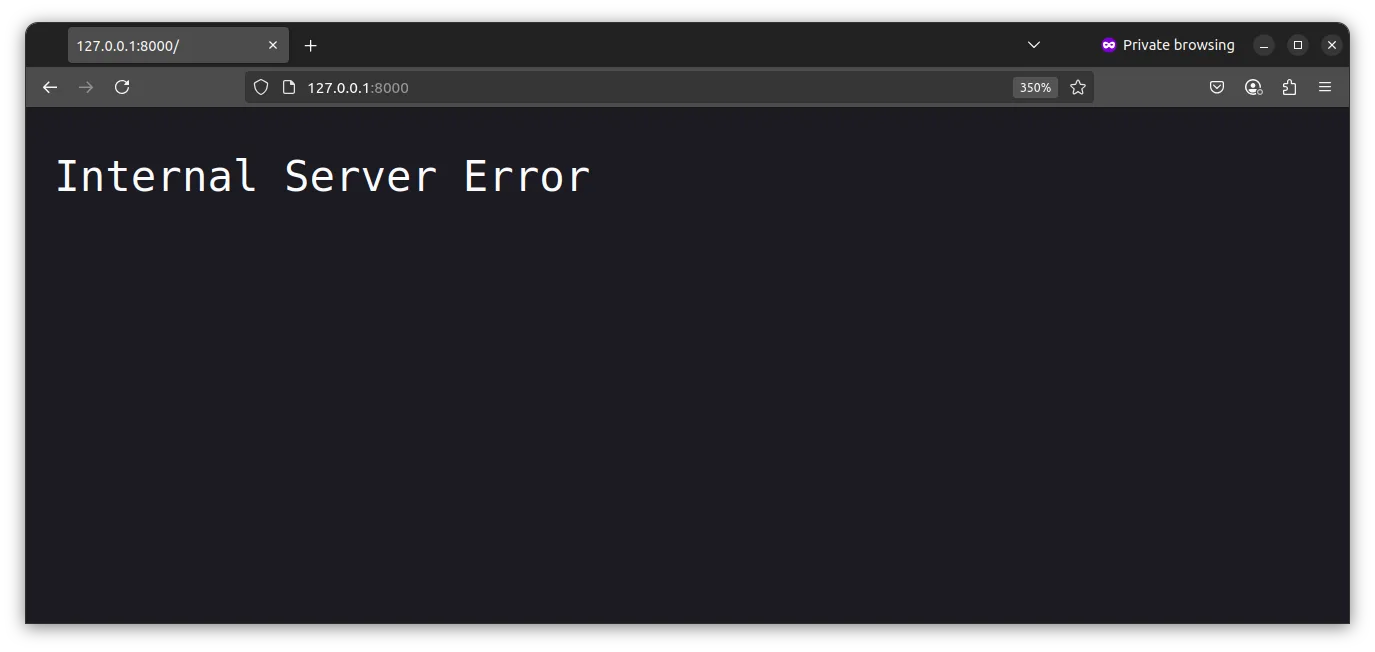
If you keep refreshing the page, the microservice will continue to return the same credentials. However, after five successful attempts, the Role ID and Secret ID will expire. On the sixth attempt, authentication will fail, and the microservice will return an internal server error indicating that it could not authenticate with Vault.
Once you're done with your practice, it's time to shut down our lab setup (Vault and the microservice). To stop and clean up the running containers, simply run:
docker compose down
This will gracefully stop both services and remove the associated containers and network. Don’t worry, your Vault data remains safe! It’s stored in persistent storage, so it won’t be lost.
Summary
AppRole is your go-to method for secure, programmatic access to Vault. It's flexible, supports automation-friendly token management, and is production-ready. Now your machines have a voice in the Vault ecosystem—without compromising security.