Chapter 28 / 28
Creating PGP Keys for Vault Security
HashiCorp Vault For Beginners5 min read
Vault supports advanced cryptographic operations and secure workflows, especially for unsealing, root token recovery, and secure key distribution. One of the mechanisms Vault supports in these workflows is PGP (Pretty Good Privacy) encryption. PGP ensures that sensitive values (like unseal keys or root tokens) are shared securely and can only be decrypted by intended recipients. In this chapter, you'll learn how to generate a secure PGP keypair using the GnuPG (GPG) tool.
Why PGP is Important in Vault Workflows
HashiCorp Vault supports PGP for:
- Encrypting unseal keys when using Shamir's key sharing.
- Securely delivering the root token during the
vault operator generate-rootprocess. - Secure automation and scripting, where secrets need to be shared among team members securely.
When you supply a PGP public key, Vault can encrypt sensitive information in a way that only the holder of the corresponding private key can decrypt.
Installing GPG
To work with PGP keys, we use the GPG command-line utility (GNU Privacy Guard).
Step 1: Check if GPG is Installed
gpg --version
If it is not installed, install it with one of the following:
- Ubuntu/Debian:
sudo apt update && sudo apt install gnupg
- macOS (using Homebrew):
brew install gnupg
- For alpine linux:
apk add gnupg
Generating a PGP Keypair
Step 2: Create Your PGP Key
Use the following command to launch the interactive key creation wizard:
gpg --full-generate-key
You will be prompted to answer several questions:
- Key type – Choose the default (
1) for RSA and RSA. - Key size – Choose at least
4096bits for strong security. - Expiration – You can specify a duration (e.g.,
1yfor one year) or set it to never expire (0). - User ID:
- Real name (e.g.,
Vault Operator) - Email address (e.g.,
vault@example.com)
- Real name (e.g.,
- Passphrase – Choose a strong, memorable passphrase to protect the private key.
Example Output
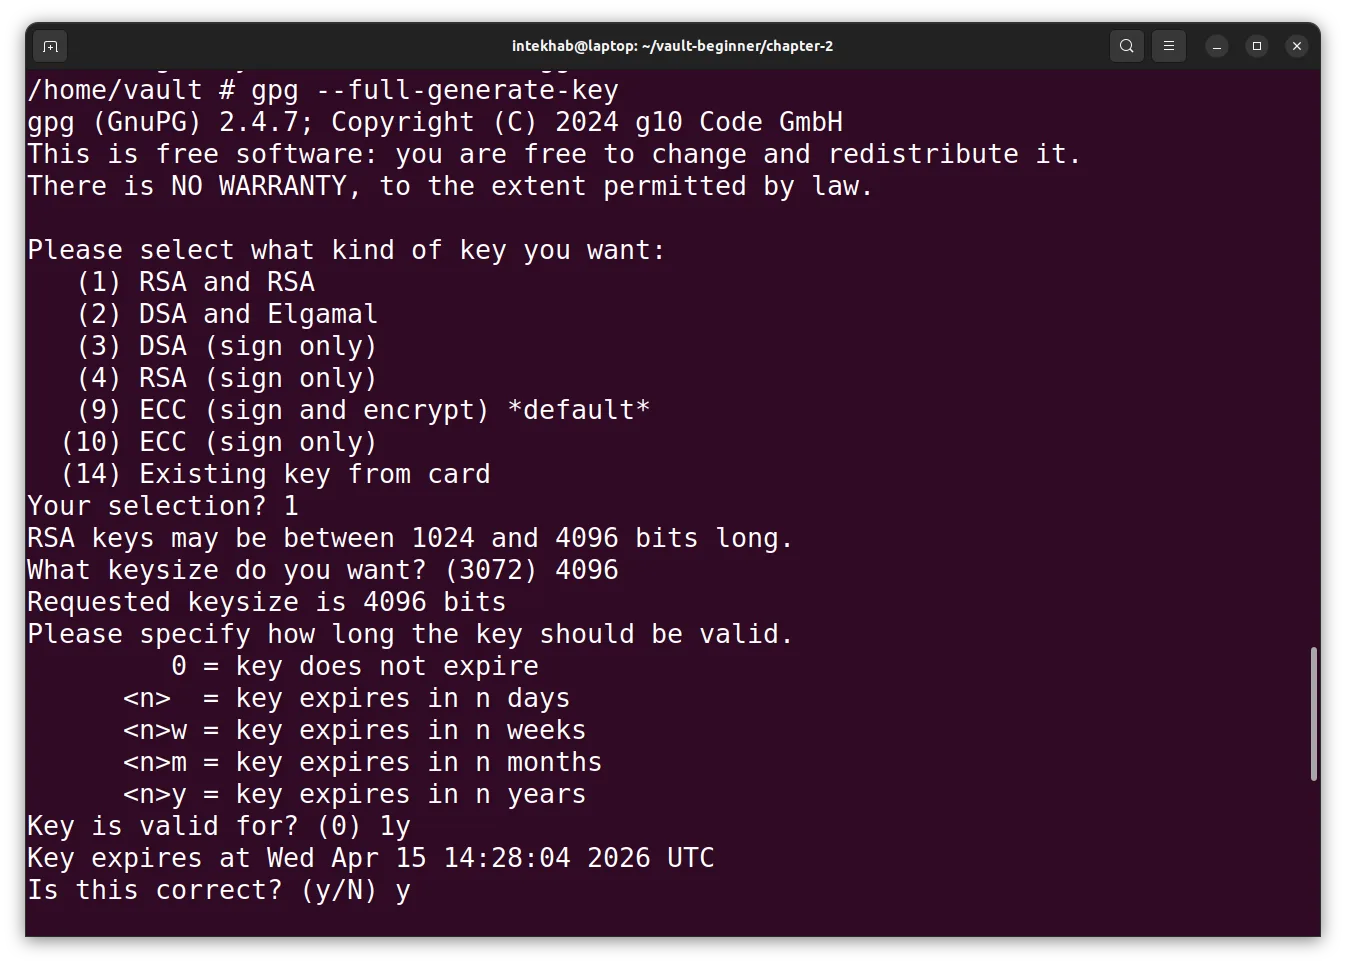
Once the key is created, GPG will display a confirmation and begin creating the keypair.
Listing and Managing PGP Keys
Step 3: View Your Key
gpg --list-keys
This will output something like:
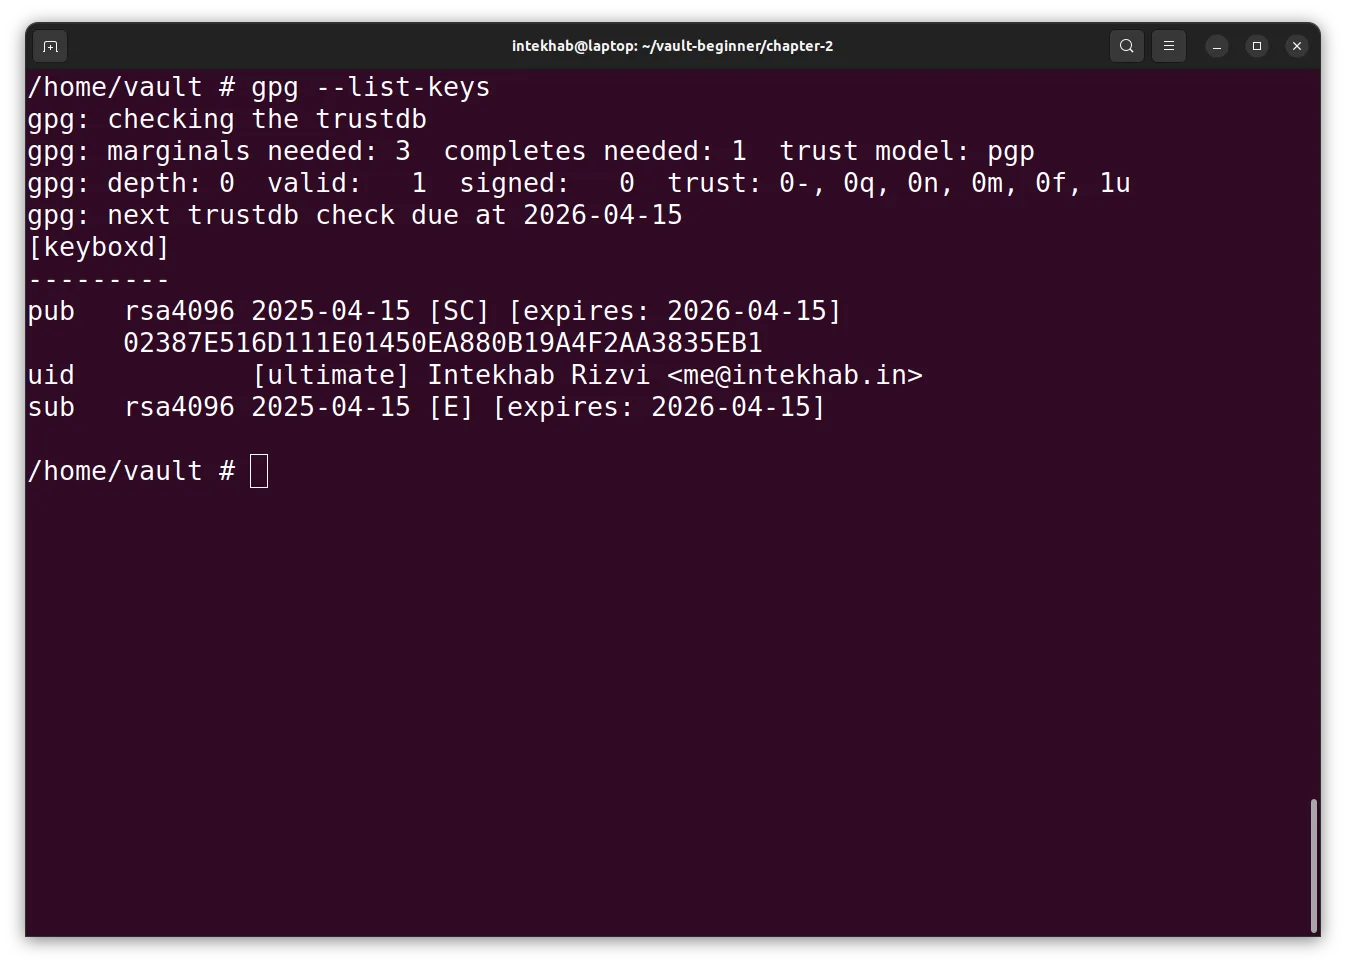
The long string under pub is your key ID (fingerprint).
Exporting the Keys
Step 4: Export Public Key
You’ll use this when configuring Vault commands:
gpg --armor --export [YOUR_EMAIL_ADDRESS_HERE] > public-key.asc
This creates an ASCII-armored file public-key.asc that you can safely share with Vault.
To view the public key directly:
gpg --armor --export [YOUR_EMAIL_ADDRESS_HERE]
Step 5: Export Private Key (Optional – For Backups Only)
Only export the private key if you need it for secure backup.
gpg --armor --export-secret-key [YOUR_EMAIL_ADDRESS_HERE] > private-key.asc
Important: Store the private key securely. It provides access to everything encrypted with the corresponding public key.
Testing the Keypair
You can quickly test that encryption and decryption work:
Encrypt a Sample Message
echo "Hello Vault!" | gpg --armor --encrypt --recipient [YOUR_EMAIL_ADDRESS_HERE] > message.asc
Decrypt the Message
gpg --decrypt message.asc
Summary
- You created a strong RSA-based PGP key using GPG.
- You exported the public key for use in Vault.
- You optionally exported the private key for backup.
- You verified that encryption and decryption work end to end.