Chapter 16 / 28
Dynamic Secrets with PostgreSQL
HashiCorp Vault For Beginners9 min read
Introduction
We’ve seen how Vault dynamically creates database credentials for MySQL. Now it’s time to explore the same for PostgreSQL.
In this chapter, we’ll:
- Spin up Vault, PostgreSQL, and Adminer using Docker Compose.
- Configure Vault to generate PostgreSQL users on the fly.
- Understand the configuration options like
creation_statements,allowed_roles, and templating variables like{{name}}. - Test the generated secrets with Adminer.
Step 0: Clean Up Previous Setup
Before we begin, let’s make sure no conflicting containers are running from our previous exercises.
Run:
docker compose down
This will stop and remove all existing containers. We’re starting fresh.
To speed up the hands-on experience, we've already created the
docker-compose.ymlfiles for you and placed them inside thechapter-16folder. Make sure to go inside the chapter-16 folder before executing the docker compose up -d command.
Step 1: Docker Compose Playground
Here’s our new docker-compose.yml to spin up Vault, PostgreSQL, and Adminer (our DB web UI):
services:
  vault-dev:
    image: hashicorp/vault:latest
    container_name: vault-dev
    ports:
      - "8200:8200"
    environment:
      VAULT_DEV_LISTEN_ADDRESS: "0.0.0.0:8200"
    volumes:
      - ../vault-data/config:/vault/config
      - ../vault-data/file:/vault/file
      - ../vault-data/logs:/vault/logs
      - ../:/home/vault/vault-beginner
    cap_add:
      - IPC_LOCK
    command: "server"
  postgres:
    image: postgres:15
    container_name: postgres
    environment:
      POSTGRES_USER: root
      POSTGRES_PASSWORD: rootpassword
      POSTGRES_DB: vaultdb
    ports:
      - "5432:5432"
  adminer:
    image: adminer
    container_name: adminer
    ports:
      - "8080:8080"
What’s happening here?
- Vault: Starts our vault server.
- Postgres: Starts with:
- Username:
root - Password:
rootpassword - Database:
vaultdb
- Username:
- Adminer: Lightweight web UI for interacting with the database.
Start everything:
docker-compose up -d
Step 2: Attach to the Vault Container
To interact with Vault CLI inside the container, run below command.
docker exec -it vault-dev /bin/sh
Now you’re inside the Vault container.
Step 3: Export the Vault Address
Before using Vault CLI, we need to tell it where Vault is running.
export VAULT_ADDR=http://localhost:8200
This command sets the Vault server address as an environment variable. The CLI uses this to send all your requests to Vault.
Step 4: Unseal the Vault
Vault is sealed by default for security. To unseal it, you need to provide at least three unseal key shares from the initialization step in Chapter 3.
Run the following command three times, each time providing one unseal key when prompted:
vault operator unseal
Paste a different unseal key each time. After the third key, Vault will be unsealed and ready to use.
Note: Use the unseal keys you saved during initialization. If those keys are lost, you'll need to reinitialize Vault from scratch.
Step 5: Login to Vault
Login as root
vault login <your-root-token>
(Replace <your-root-token> with your actual root token you have received when you performed the vault operator init.)
Step 6: Enable Database Secrets Engine on a Custom Path
This time, we’ll enable the database secrets engine on a custom path named pgdb.
vault secrets enable -path=pgdb database
Why use a custom path?
By default, Vault enables secrets engines at paths like database/, kv/, etc. But using a custom path (pgdb in this case) gives you flexibility:
- You can manage multiple databases (e.g., MySQL, PostgreSQL) side by side.
- You avoid name clashes if different roles or apps use different engines.
- It improves clarity and structure in your Vault layout.
All of our subsequent Vault commands in this chapter will use the
pgdb/path to interact with PostgreSQL.
Step 4: Configure Vault to Connect to PostgreSQL
Vault will need root credentials to manage PostgreSQL roles. Instead of hardcoding them, we’ll use Vault templating to inject them via environment variables:
vault write pgdb/config/my-postgres-db \
  plugin_name=postgresql-database-plugin \
  allowed_roles="readonly-role" \
  connection_url="postgresql://{{username}}:{{password}}@postgres:5432/vaultdb?sslmode=disable" \
  username="root" \
  password="rootpassword"
Breakdown:
pgdb/config/my-postgres-db: Path where this config is saved.plugin_name: Tells Vault what type of DB plugin to use.allowed_roles: Only these Vault roles are allowed to use this DB config.connection_url: Vault injects{{username}}and{{password}}from below.usernameandpassword: Used to authenticate with the DB (as root).
This setup gives Vault full control over the database.
Step 5: Create a Readonly Role
vault write pgdb/roles/readonly-role \
  db_name=my-postgres-db \
  creation_statements="CREATE ROLE \"{{name}}\" WITH LOGIN PASSWORD '{{password}}' VALID UNTIL '{{expiration}}'; GRANT SELECT ON ALL TABLES IN SCHEMA public TO \"{{name}}\";" \
  default_ttl="1h" \
  max_ttl="24h" \
  num_uses=5
What’s happening here?
pgdb/roles/readonly-role: Our dynamic role path.db_name: Links to themy-postgres-dbconfig we wrote earlier.creation_statements: SQL used to create the dynamic user.
Let’s dissect the placeholders:
{{name}}: Vault-generated username.{{password}}: Vault-generated password.{{expiration}}: Time when the credential should expire.
So every time this role is used, Vault will:
- Generate a unique username/password.
- Grant read-only (SELECT) access to the public schema.
- Set TTL and number of uses to expire/lock the credentials.
Step 6: Generate Dynamic Credentials
Run:
vault read pgdb/creds/readonly-role
You will see output like below.
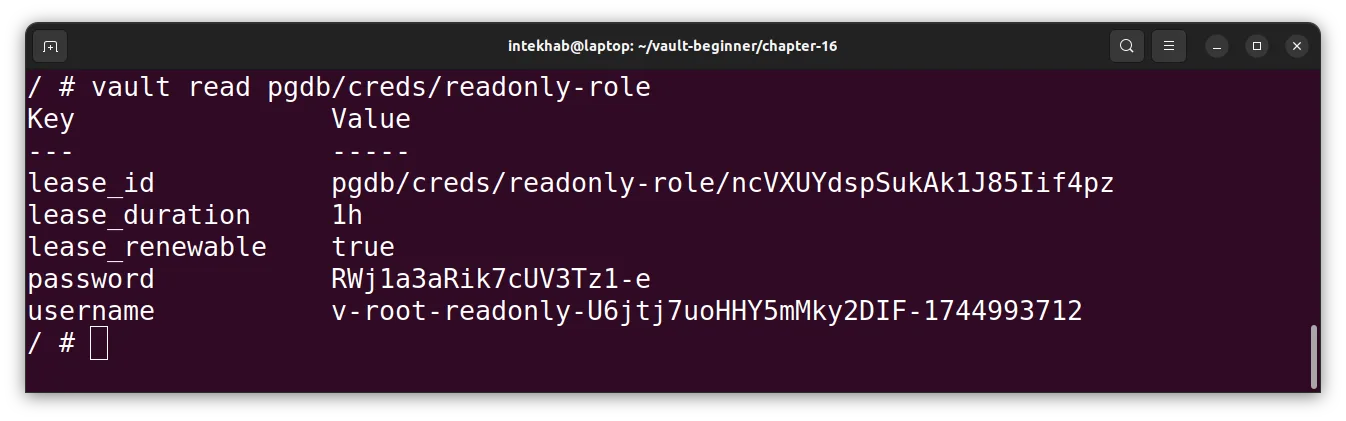
This credential is valid for 1 hour or 5 uses—whichever comes first.
Step 7: Use It with Adminer
- Go to http://localhost:8080
- Fill in:
- System: PostgreSQL
- Server: postgres
- Username and Password: From the Vault response
- Database:
vaultdb
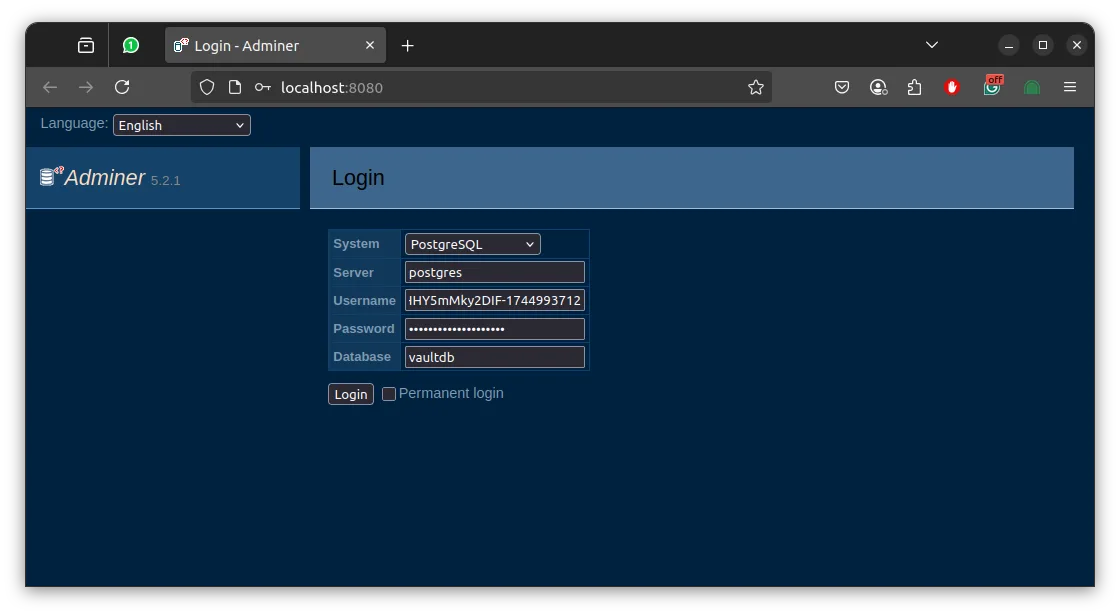
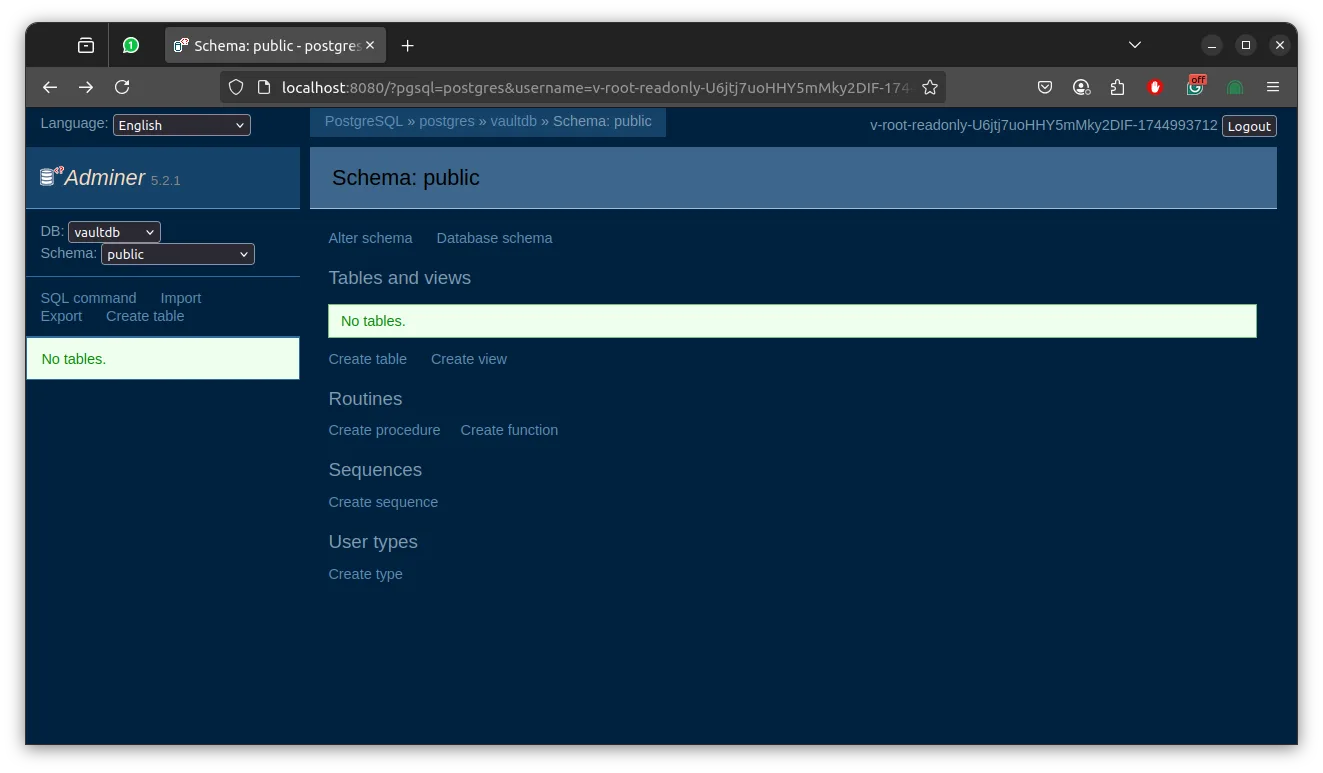
Hit Login. You should land in the DB with read-only rights.
Optional: Revoke the Dynamic Secret
Run below command. Don’t forget to replace <<lease_id>> to the real id you have received from the step 6.
vault lease revoke <<lease_id>>
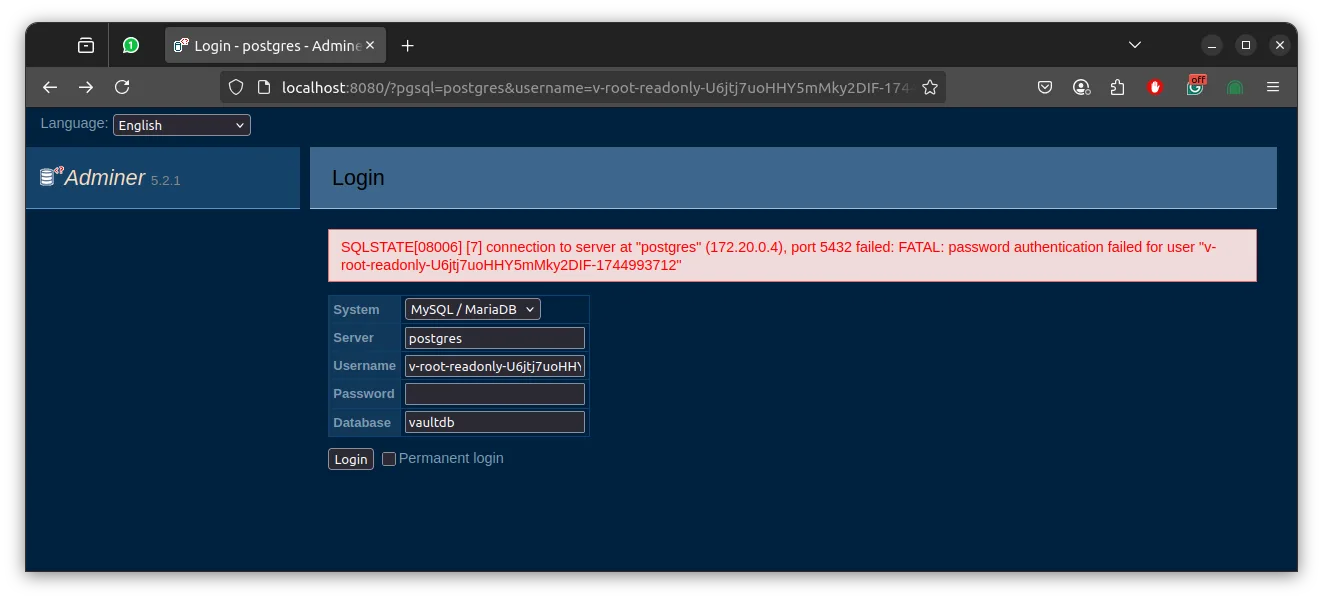
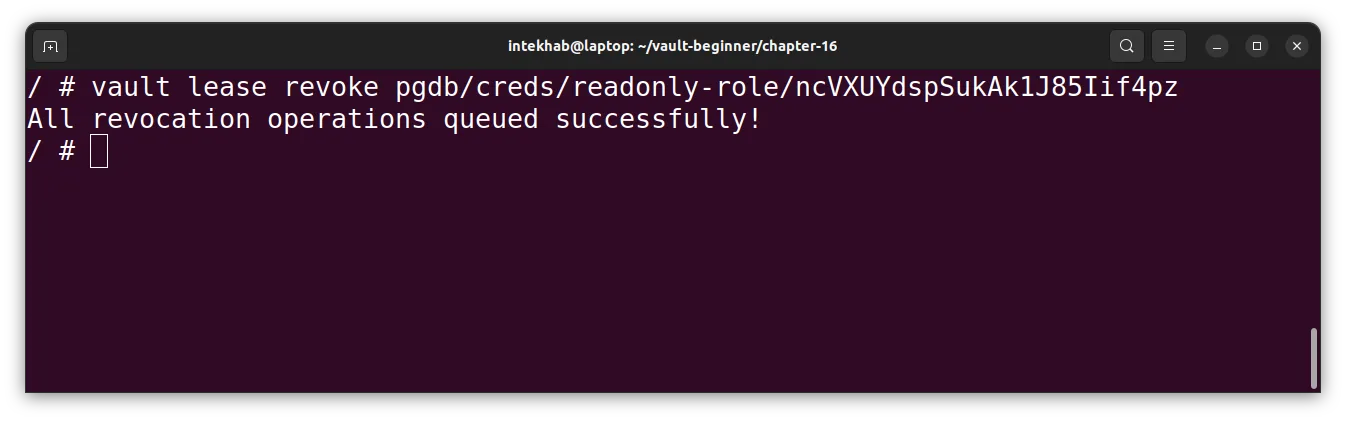
This will instantly disable the secret.
\
Conclusion
You just learned how to configure dynamic secrets for PostgreSQL with Vault.
We:
- Brought up a full stack using Docker.
- Enabled the database engine on a custom path.
- Injected credentials via variables.
- Created and tested a real-time generated database user.
- Explored advanced options like
num_usesand{{name}}templating.