Chapter 18 / 28
Getting Started with the Vault API: Your First Step to Automation
HashiCorp Vault For Beginners10 min read
So far, you've been interacting with Vault using the command-line interface (CLI). It's intuitive and ideal for manual tasks. But software doesn't use a terminal—it speaks through APIs. If you want your applications, automation scripts, or microservices to talk to Vault, you need to understand how to use Vault's HTTP API.
This chapter marks the transition from human-driven CLI interaction to machine-driven API automation.
Why Learn the Vault API?
Here’s the reality:
If you want to automate anything with Vault—authenticating, issuing secrets, rotating credentials—you’ll need to use the API.
| CLI | HTTP API |
|---|---|
| Made for people | Made for machines |
| Simple commands | Standard HTTP requests |
| Not automation-friendly | Ideal for scripts, apps, pipelines |
| Manual | Repeatable and scalable |
The HTTP API allows Vault to be deeply integrated into your applications and systems. Every single action you’ve taken with the CLI enabling secrets engines, reading secrets, logging in is powered underneath by an API call. Vault’s CLI is simply a wrapper over its HTTP API. Now we’re peeling back the wrapper.
In this chapter, we’ll explore how to interact with Vault programmatically using HTTP API calls, which is essential for automation and integrating Vault into applications or services. We will specifically work with the KV V2 secrets engine, which allows you to store and manage secrets as key-value pairs.
Step 0: Clean Up Previous Setup
Before we begin, let’s make sure no conflicting containers are running from our previous exercises.
Run:
docker compose down
This will stop and remove all existing containers. We’re starting fresh.
Step 1: Start a Vault Container
Run the following command to start a standalone Vault container, which is sufficient for this exercise.
docker run -d --rm \
  -p 8200:8200 \
  -v $(pwd)/vault-data/config:/vault/config \
  -v $(pwd)/vault-data/file:/vault/file \
  -v $(pwd)/vault-data/logs:/vault/logs \
  -v $(pwd):/home/vault/vault-beginner \
  --cap-add=IPC_LOCK \
  --name vault-dev \
    hashicorp/vault:latest server
Before starting the Vault container, make sure you're in the root directory of the project — the vault-beginner folder.
So far, we've been unsealing Vault using the CLI. In this chapter, we’ll switch gears and do everything using the Vault HTTP API.
To follow along:
- Keep your existing Vault container running.
- Open a new terminal tab or window so you can make API requests while Vault is live.
- You’re absolutely free to use an API client like Postman, Insomnia, or Bruno—whatever you're comfortable with.
- But to keep things tool-agnostic and beginner-friendly, I’ll be using
curlfor all examples in this chapter.
Step 2: Set Environment Variables
Let’s set a few environment variables to make our API calls cleaner and avoid repeating values like the Vault address and token every time.
Run the following in your terminal:
export VAULT_ADDR=http://127.0.0.1:8200
export VAULT_TOKEN=<<YOUR_ROOT_TOKEN>>
Don’t forget to replace <<YOUR_ROOT_TOKEN>> with the root token you received in Chapter 3.
With these set, any curl requests we make will be easier to read and maintain.
Step 3: Unseal the Vault
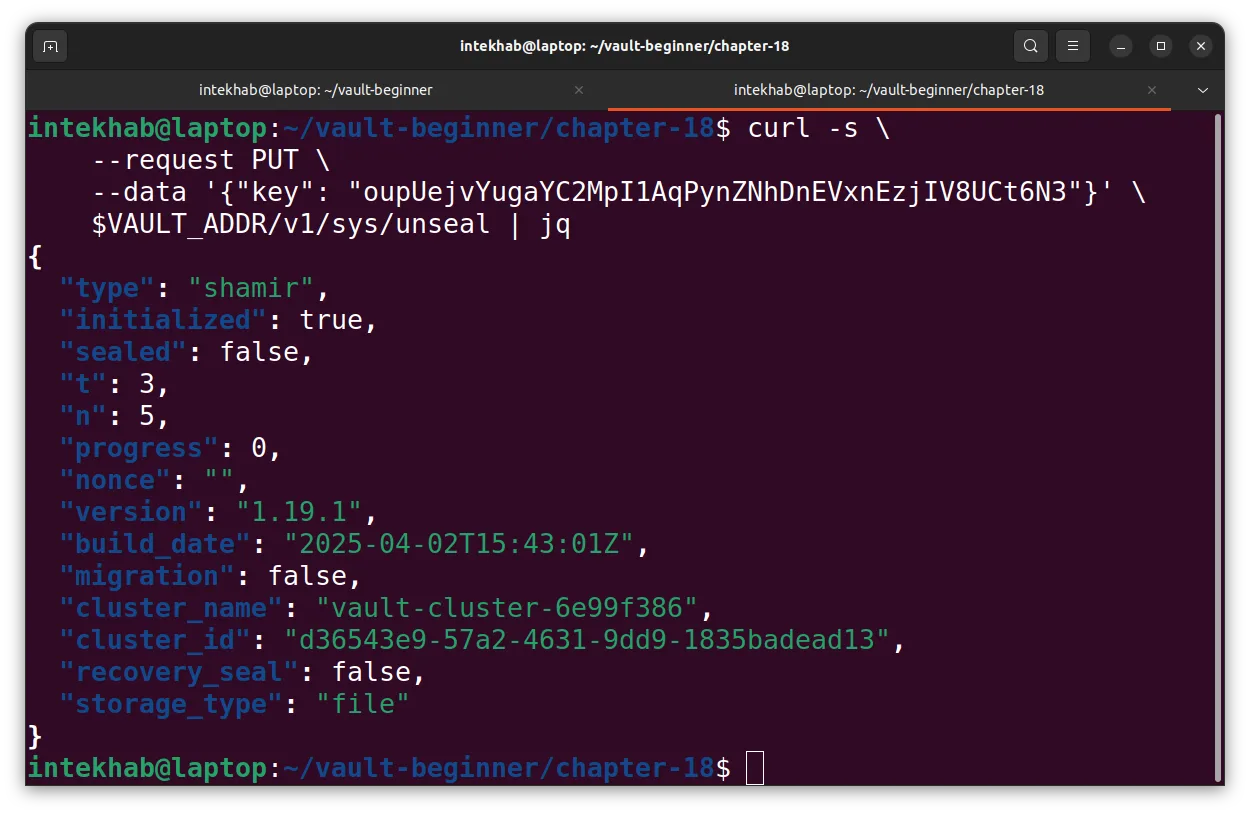
Vault requires three unseal keys to unseal. Run the following API request three times, replacing the key each time with one of your unseal keys:\
curl -s \
  --request PUT \
  --data '{"key": "<<UNSEAL_KEY>>"}' \
  $VAULT_ADDR/v1/sys/unseal
In each curl command above, make sure to replace <<UNSEAL_KEY>> with one of the actual unseal keys you received when you initialized Vault in Chapter 3.
After the third successful call, Vault will return "sealed": false indicating it's ready to use!
Let’s enable the KV V2 secrets engine on the api-exp path using the HTTP API. In this step, we will send a POST request to enable the KV V2 engine.
curl -s \
  --header "X-Vault-Token: $VAULT_TOKEN" \
  --request POST \
  --data '{"type": "kv", "options": {"version": "2"}}' \
  $VAULT_ADDR/v1/sys/mounts/api-exp
Explanation:
X-Vault-Token: $VAULT_TOKEN: The authentication token for the Vault API.--request POST: This sends a POST request to Vault to enable the engine.--data '{"type": "kv", "options": {"version": "2"}}': Specifies that we are enabling the KV engine with version 2.$VAULT_ADDR/v1/sys/mounts/api-exp: The custom path where we want to enable our Kvv2 secret engine.
Once enabled, you’ll be able to start storing and retrieving versioned secrets at:
api-exp/data/<<ANY_NAME_YOU_LIKE>>
Step 5: Create, Read, Delete, and List Secrets via API
Now that the KV V2 engine is enabled, we will go through the basic secret operations such as creating, reading, listing, and deleting secrets.
5.1 Create a Secret
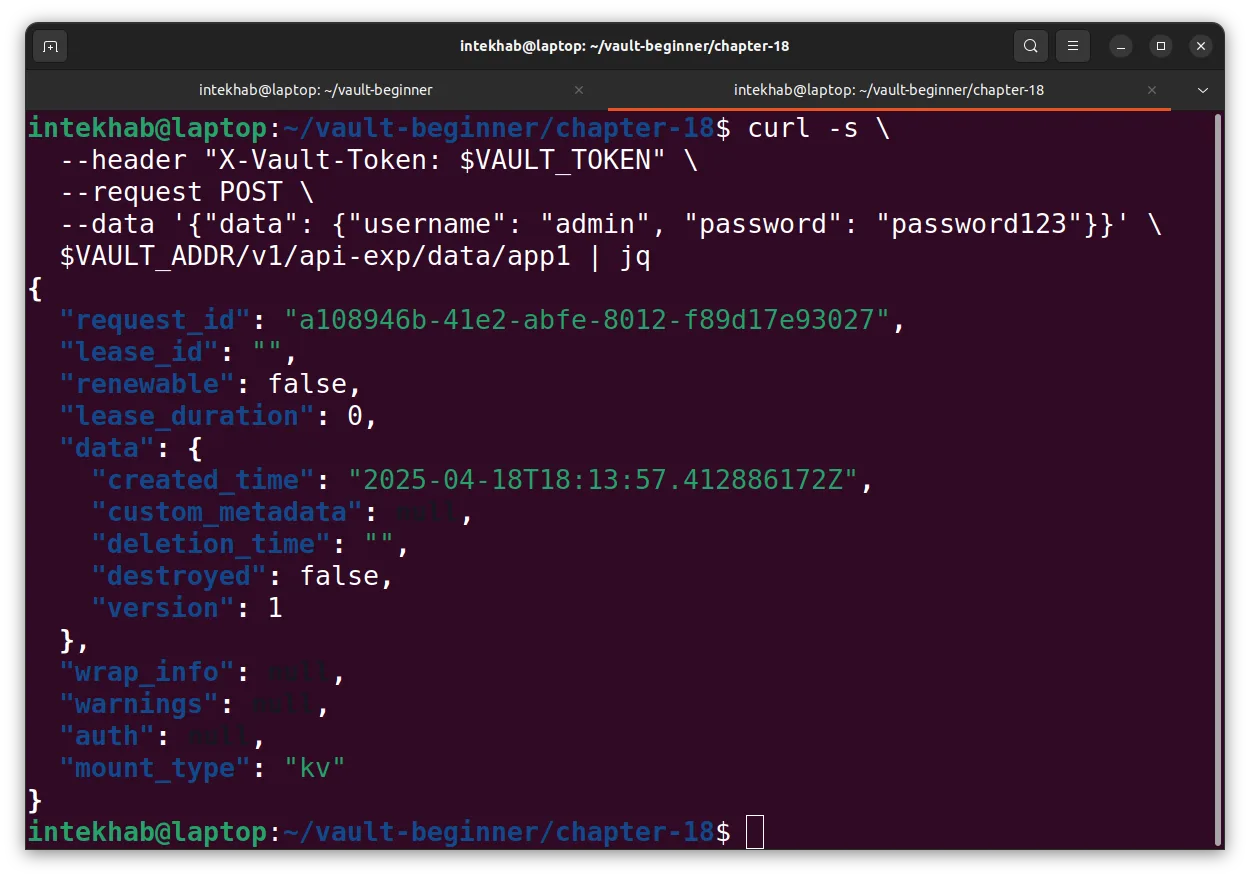
Let’s add a new secret under the path api-exp/data/app1
curl -s \
  --header "X-Vault-Token: $VAULT_TOKEN" \
  --request POST \
  --data '{"data": {"username": "admin", "password": "password123"}}' \
  $VAULT_ADDR/v1/api-exp/data/app1
Explanation:
--request POST: We are sending a POST request to create a secret.--data '{"data": {"username": "admin", "password": "password123"}}': The actual secret data, which is stored as key-value pairs underdata.$VAULT_ADDR/v1/api-exp/data/app1: The path where the secret is stored.
On success, you will see the response like below.
5.2 Read a Secret
To retrieve the secret stored under api-exp/data/app1, use the following GET request:
curl -s \
  --header "X-Vault-Token: $VAULT_TOKEN" \
  $VAULT_ADDR/v1/api-exp/data/app1
Explanation:
--request GET: By default,curluses GET for the read operation.
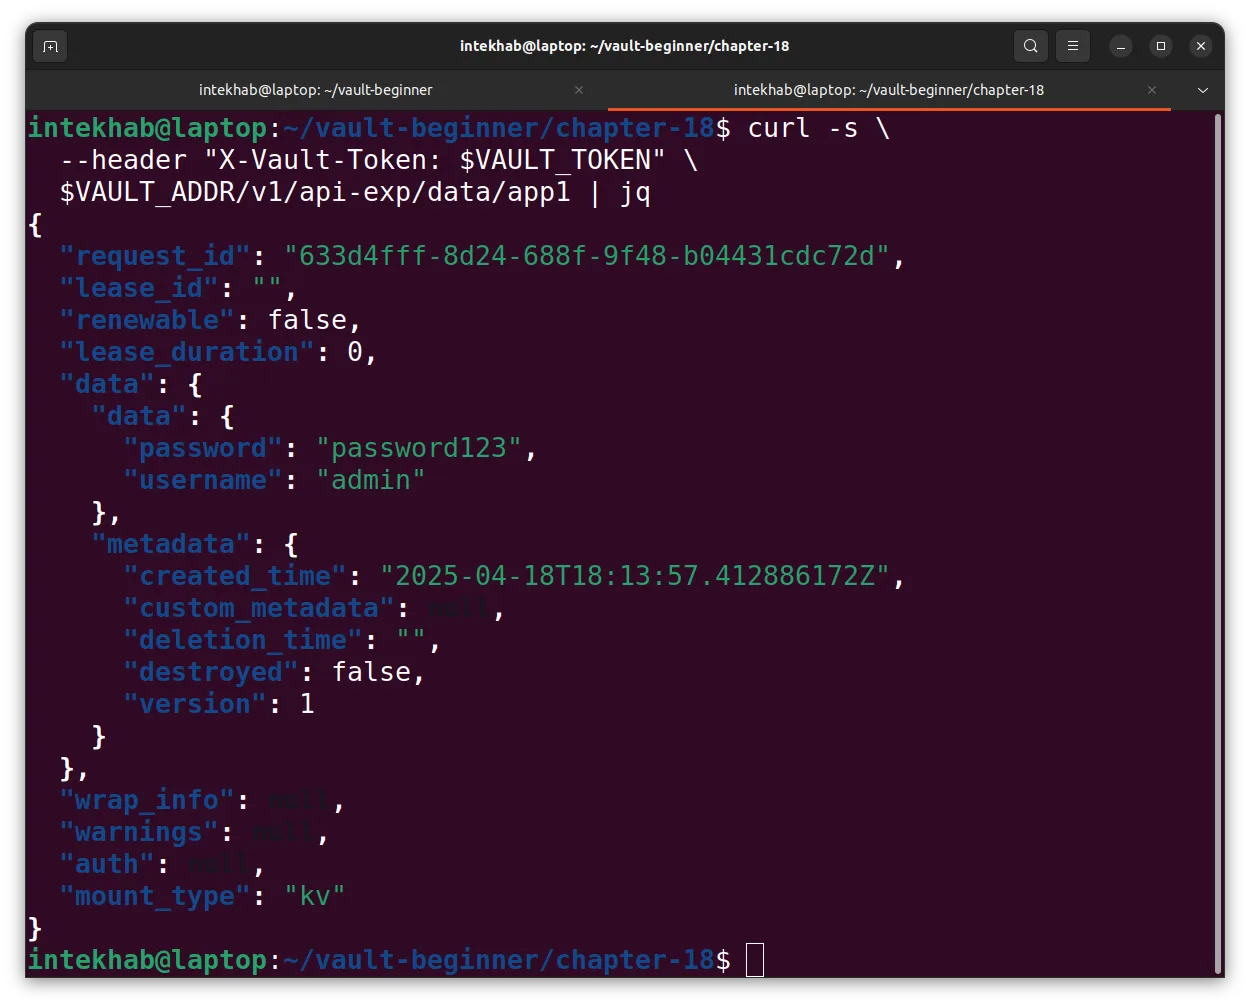
$VAULT_ADDR/v1/api-exp/data/app1: The path where the secret is stored.
5.3 List Secrets
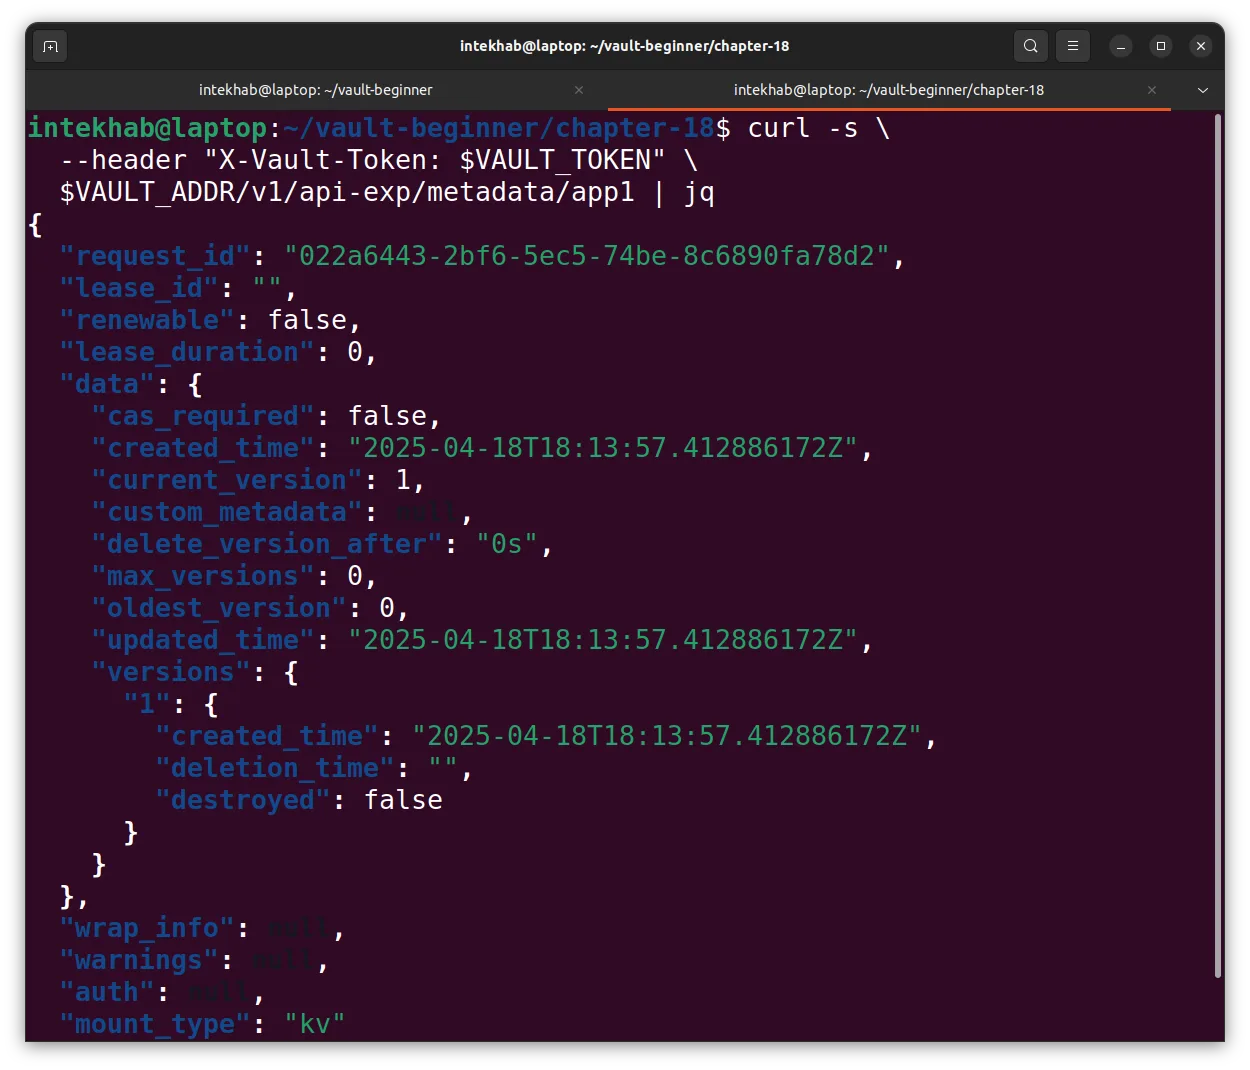
To list all secrets in the api-exp path, use this API call:
curl -s \
  --header "X-Vault-Token: $VAULT_TOKEN" \
  $VAULT_ADDR/v1/api-exp/metadata/app1
Explanation:
/v1/api-exp/metadata/app1: This is the path to list all the metadata for secrets stored in the KV V2 engine.
5.4 Delete a Secret
To delete a secret, send a DELETE request:
curl -s \
  --header "X-Vault-Token: $VAULT_TOKEN" \
  --request DELETE \
  $VAULT_ADDR/v1/api-exp/data/app1
Explanation:
--request DELETE: The DELETE HTTP method removes the secret from Vault.$VAULT_ADDR/v1/api-exp/data/app1: The path of the secret to delete.
Step 6: Recover a Deleted Secret
Sometimes you might delete a secret by mistake. Vault provides the ability to soft-delete secrets and recover them later.
6.1 Recover a Deleted Secret
If you’ve deleted a secret, you can recover it by sending a POST request to the /undelete endpoint:
curl -s \
  --header "X-Vault-Token: $VAULT_TOKEN" \
  --request POST \
  --data '{"versions":[1]}' \
  $VAULT_ADDR/v1/api-exp/undelete/app1
Explanation:
--data '{"versions": [1]}': The version number you wish to recover (you can check which versions are available from the metadata).$VAULT_ADDR/v1/api-exp/undelete/app1/: The path to the secret that was deleted in this pattern /:secret-mount-path/undelete/:path
6.2 Verify Recovery
Once you’ve recovered a secret, you can verify its restoration by reading it again:
curl -s \
  --header "X-Vault-Token: $VAULT_TOKEN" \
  $VAULT_ADDR/v1/api-exp/data/app1
Summary
In this chapter, we covered the basic operations you can perform with the Vault API on the KV V2 secrets engine. The key points we addressed are:
- Enabling the KV V2 Engine: We used the API to enable the KV V2 secrets engine.
- Create, Read, Delete, List Secrets: We performed the basic operations using the Vault API.
- Recovering Deleted Secrets: We learned how to recover a soft-deleted secret using the API.