Chapter 10 / 28
Policies in Action
HashiCorp Vault For Beginners6 min read
In the previous chapter, Alice logged in successfully. But when she tried to read the secret we stored? Failed.
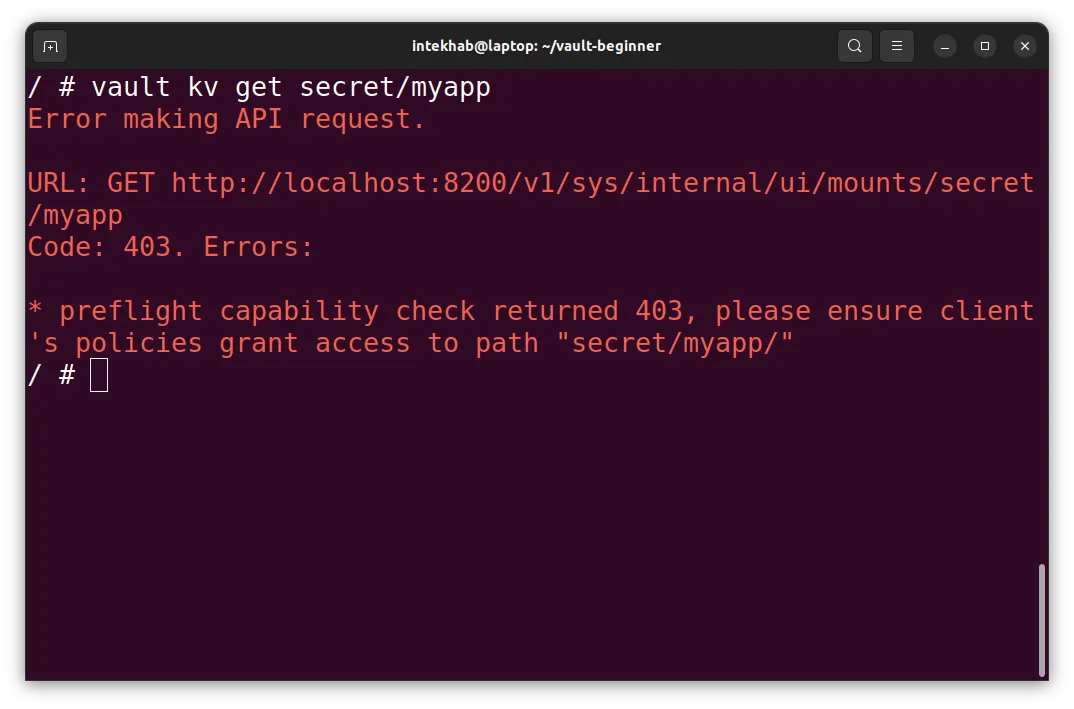
** Vault did exactly what it’s supposed to do.
Every user or app must be explicitly granted access via policies — Vault’s main authorization mechanism.
Now it’s time to fix that — but we can’t do it as Alice.
Important: Log Out as Alice and Log Back In as Root
Since Alice only has the default policy, she can’t:
- Write or edit policies
- Assign policies to other users
- Manage Vault configuration
So first, we need to switch back to the root token or an admin-level token you used during initialization:
vault login
# Paste your root token when prompted
You should see something like:
Success! You are now authenticated.
token:      s.rootxxxxxxxx
policies:   [root]
Now we can proceed.
What is a Policy?
A policy is a set of rules that define:
- What paths in Vault a user or token can access
- What actions (read, write, list, delete, etc.) they can perform
You write policies in HCL or JSON format and assign them to users, tokens, or apps.
Step 1: Create the kv1-reader Policy
This policy gives read-only access to KV v1 secrets stored under the secret/ path.
Create a file named kv1-reader.hcl:
# kv1-reader.hcl
path "secret/*" {
  capabilities = ["read", "list"]
}
To speed up the hands-on experience, we've already created the policy files for you and placed them inside the
chapter-09folder.
If you're using the Docker start command from Chapter 2, thevault-beginnerfolder is automatically mounted inside the Vault container at/home/vault/vault-beginner``. From now on, before executing any commands mentioned in the upcoming chapters, make sure you first navigate to this directory.
Apply the policy to Vault:
vault policy write kv1-reader chapter-09/kv1-reader.hcl
Success! Policy uploaded.
Step 2: Create the kv2-reader Policy
KV v2 paths are structured differently. You need access to data/ for secrets and metadata/ for listing.
Here’s the kv2-reader.hcl:
# kv2-reader.hcl
path "kvv2/data/*" {
  capabilities = ["read"]
}

path "kvv2/metadata/*" {
  capabilities = ["list"]
}
Apply it:
vault policy write kv2-reader chapter-09/kv2-reader.hcl
Done.
Step 3: Assign Both Policies to Alice
Now, let’s update Alice’s record to assign both policies (kv1-reader and kv2-reader):
vault write auth/userpass/users/alice \
  password="123456" \
  policies="kv1-reader,kv2-reader"
Reminder: Always include the password during updates — or it gets wiped out.
Step 4: Verify Policies Assigned to Alice
To confirm which policies are assigned:
vault read auth/userpass/users/alice
Look for Policies:
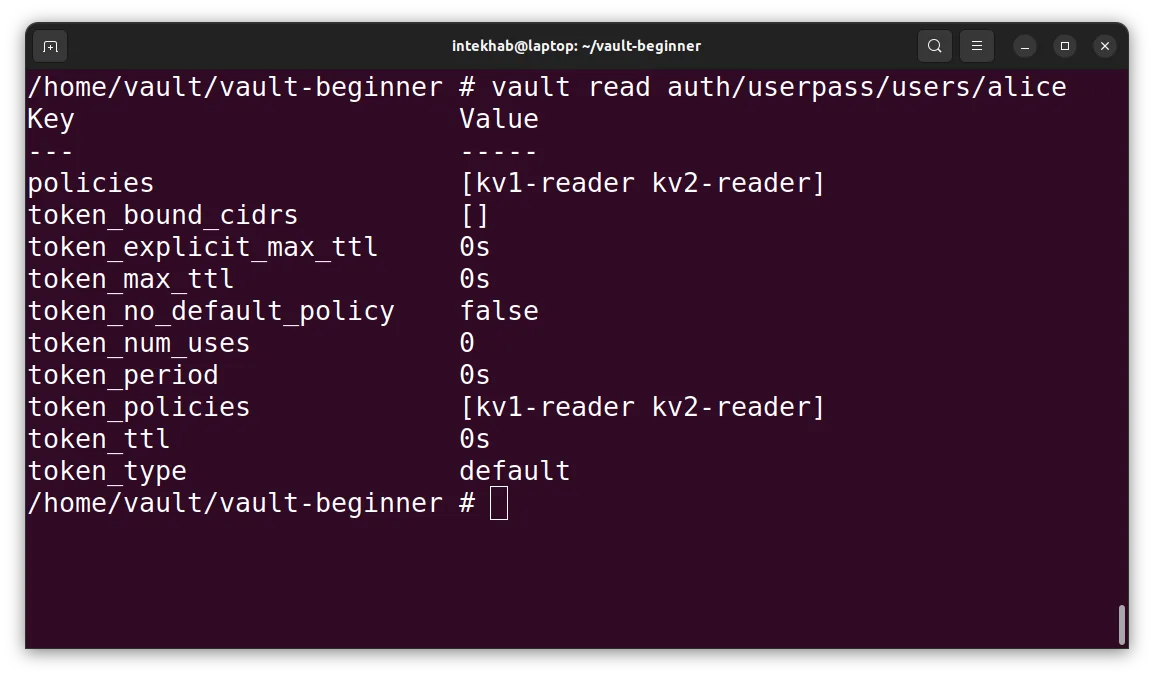
Looking good.
Step 6: Log Back In as Alice
Now we’re done with the root user.
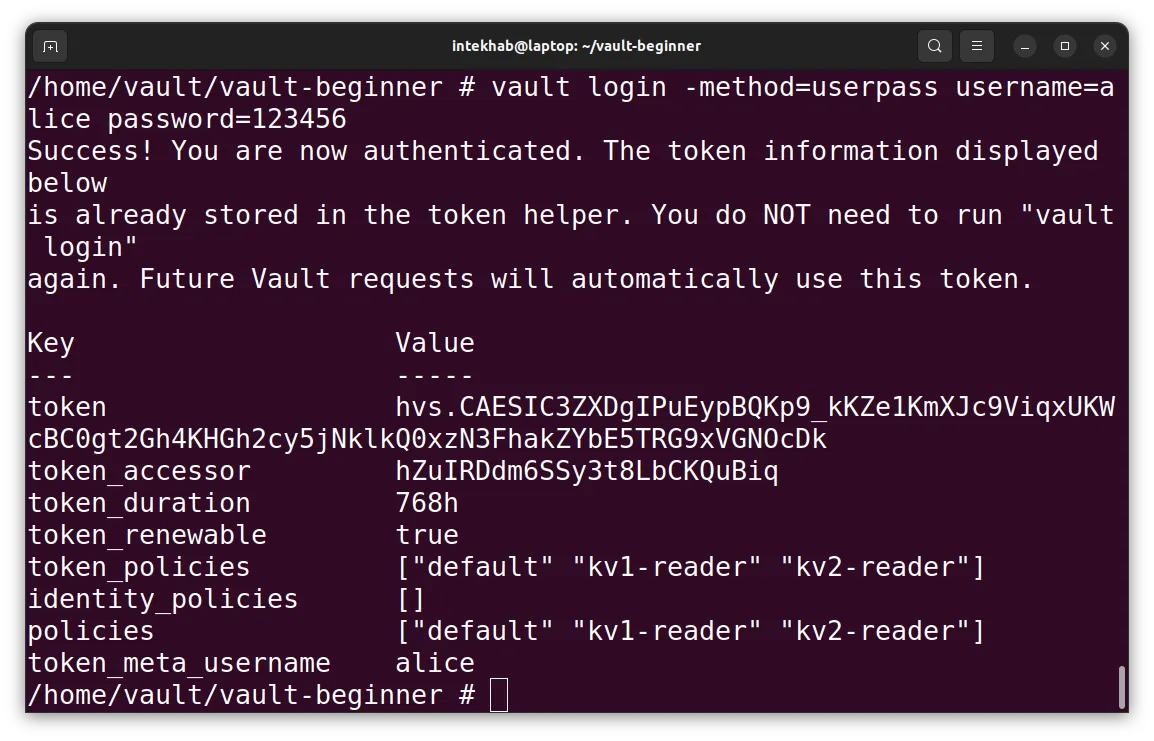
Let’s log back in as Alice:
vault login -method=userpass username=alice password=123456
You should now see. Look at the policies assgined to user. Now instead of just default policy, you will see 2 more policies attached to the user.
Step 7: Test Access as Alice
Let’s try reading both types of secrets.
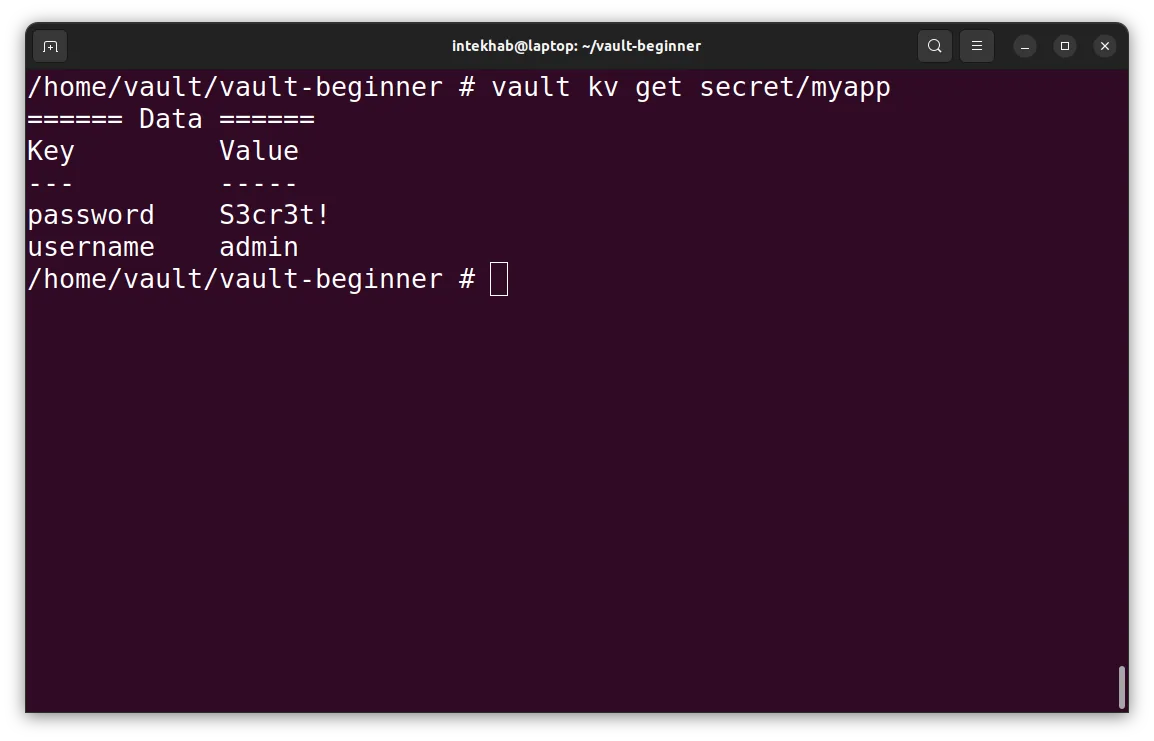
First, let’s read Kv-v1 secret engine.
vault kv get secret/myapp
It should work and you would see the result like below.
Now Let’s try Kv-v2 secret engine. Execute below command.
vault kv get kvv2/project1/api
It should work and you would see the result like below.
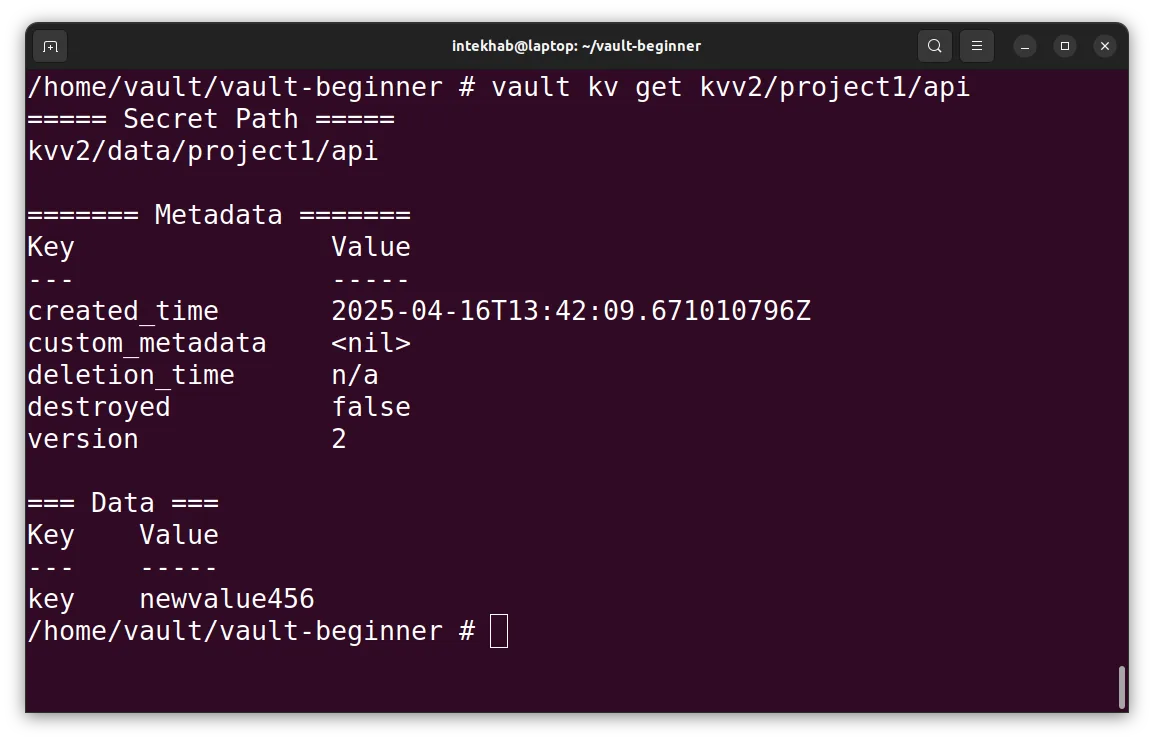
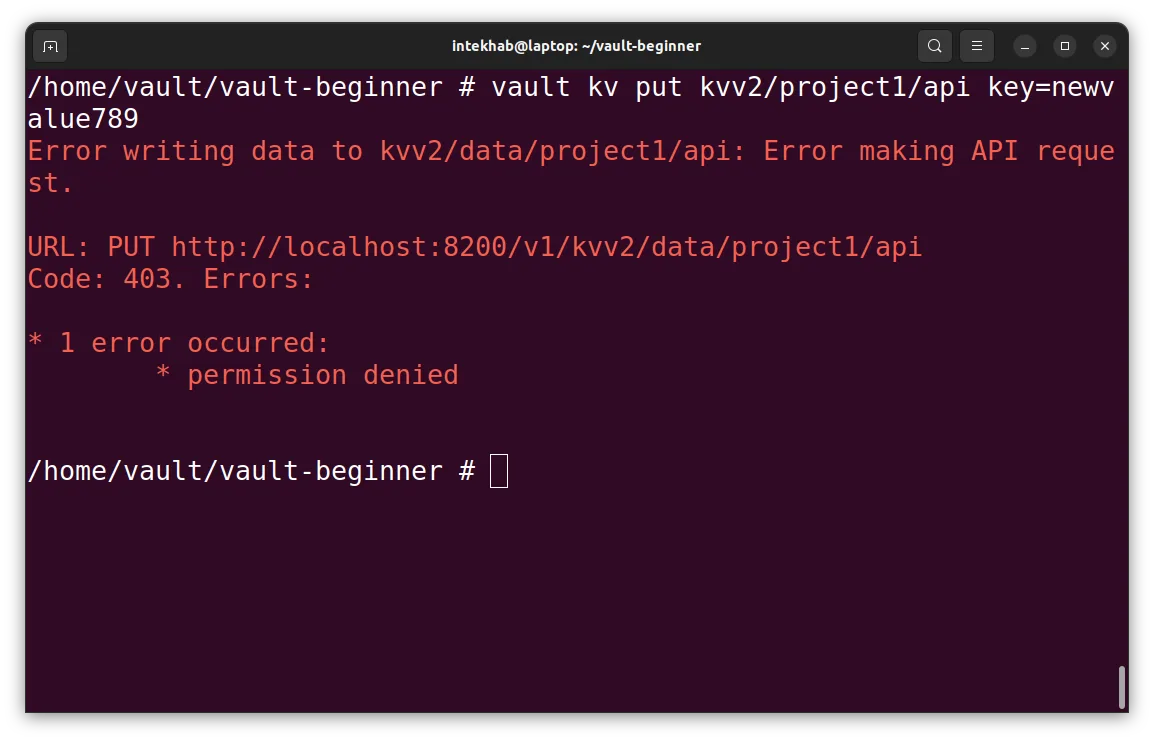
Now, let’s try to write something inside the kv-v2 secret engine. We will use the same command we have used earlier. Let’s see what happens.
vault kv put kvv2/project1/api key=newvalue789
It should fail because we have given Alice just a read-only access.
Summary
- Alice had no access initially because she only had the
defaultpolicy. - We switched back to the root user to create and assign new policies.
- Gave Alice access to both KV v1 and KV v2 secrets through separate policies.
- Saw how to list, inspect, and assign policies.
- Verified everything by logging in as Alice and testing access.