Chapter 21 / 28
Transit Secrets Engine: Encryption as a Service
HashiCorp Vault For Beginners25 min read
Vault isn’t just a secure storage locker for your secrets. It can also act as a cryptographic service — encrypting and decrypting data without ever storing it. This is the superpower of the Transit Secrets Engine. With it, Vault offers encryption as a service: your application sends data, Vault encrypts or decrypts it, and your application handles the storage.
Vault never saves your data. It just performs the transformation.
In this chapter, we’ll go in-depth on:
- Setting up the Transit engine.
- Creating encryption keys.
- Encrypting and decrypting data.
- Signing and verifying data.
- Real-world use cases.
Why Transit?
Before you reach for client-side encryption libraries, here’s what Vault’s Transit engine brings to the table:
- Centralized key management: Rotate, revoke, and control keys from a single place.
- No data persistence: Vault never stores plaintext or ciphertext. It simply encrypts/decrypts on request.
- Secure APIs: Your app doesn't need to manage keys — just interact with Vault.
- Compliance-friendly: Audit logs track access to keys and operations performed.
Ideal for:
- Tokenization of sensitive fields (e.g card numbers, Customer PII etc etc).
- Database field-level encryption.
- Signing and verifying data blobs.
Let’s do some hands-on practice.
Step 1: Start Vault Container
Let’s begin by starting the standalone Vault container using the command below: Make sure you are at the top folder of the cloned repo.
docker run -d \
  -p 8200:8200 \
  -v $(pwd)/vault-data/config:/vault/config \
  -v $(pwd)/vault-data/file:/vault/file \
  -v $(pwd)/vault-data/logs:/vault/logs \
  -v $(pwd):/home/vault/vault-beginner \
  -e VAULT_ADDR="http://localhost:8200/" \
  --cap-add=IPC_LOCK \
  --name vault-dev \
    hashicorp/vault:latest server
Step 2: Attach to the Vault Container
Execute the following command to connect to the running Vault container:
docker exec -it vault-dev /bin/sh
Once you're inside the container, set the Vault address by exporting it as an environment variable. This ensures the Vault CLI knows where to send requests.
export VAULT_ADDR='http://127.0.0.1:8200'
Step 3: Unseal the Vault
Vault is sealed by default for security. To unseal it, you need to provide at least three unseal key shares from the initialization step in Chapter 3.
Run the following command three times, each time providing one unseal key when prompted:
vault operator unseal
Paste a different unseal key each time. After the third key, Vault will be unsealed and ready to use.
Step 4: Login to Vault
Login as root
vault login <your-root-token>
(Replace <your-root-token> with your actual root token you have received when you performed the vault operator init.)
Step 5: Enable the Transit Engine
Let’s enable the Transit secrets engine using its default mount path. Run the following command inside the Vault container:
vault secrets enable transit
This mounts the Transit engine at the default path transit/, allowing us to use Vault for cryptographic operations like encryption, decryption, and key rotation—without storing any data.
You can also mount it at a custom path:
vault secrets enable -path=enc transit
You will see the output like below.
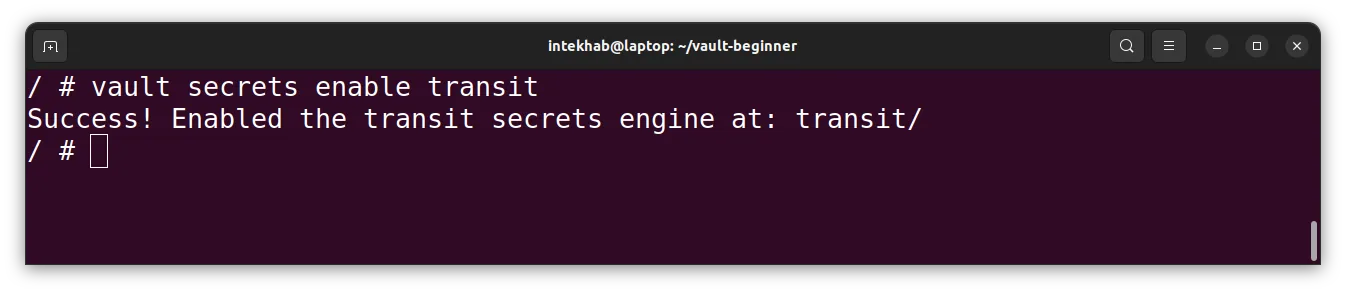
Make sure to use the `/transit` path in all the subsequent commands throughout this chapter. If you’ve chosen to mount the Transit secrets engine at a custom path instead, don’t forget to update the commands accordingly to reflect your specific mount path.
Step 6: Create an Encryption Key
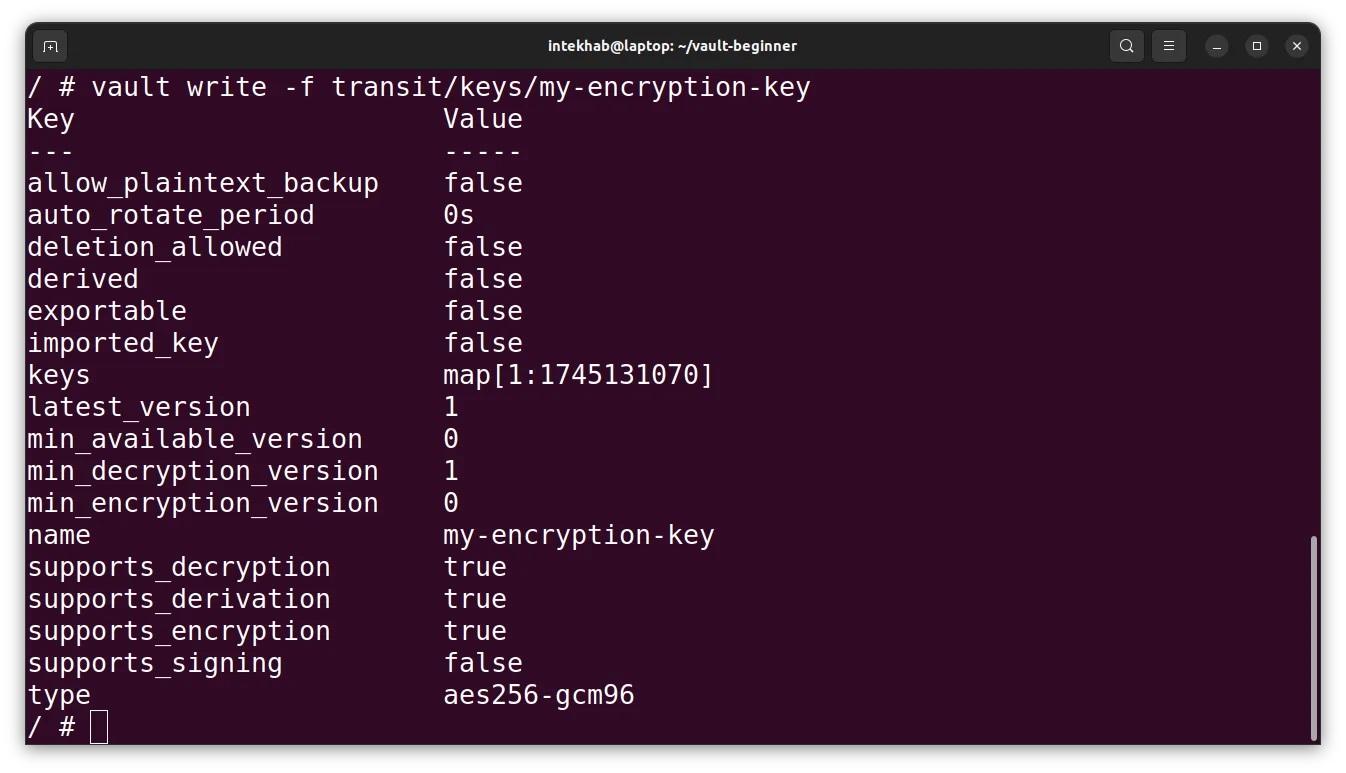
Now that the Transit secrets engine is enabled, it’s time to create a named encryption key that Vault will use to perform cryptographic operations. Think of this as defining a logical key inside Vault. Vault manages the actual key material for you behind the scenes. This key will be used to encrypt and decrypt data via the API without exposing the raw key to your application. You can give the key any name (e.g., `customer-data`), and Vault will maintain all the versioning, rotation, and security controls for it. To create it, simply run the below command.
vault write -f transit/keys/my-encryption-key
Here’s what it does:
- Creates a key named
my-encryption-key. - The key will be used to encrypt and decrypt data.
- You can create multiple keys, each for a different purpose or app.
Once the command runs successfully, you’ll see the configuration details for the newly created key, including its settings and available options, as shown below.
Now that your encryption key is ready, let’s put it to use. Vault’s Transit Secrets Engine doesn’t store any data—it’s purely for cryptographic operations. That means you send your plaintext data to Vault, and it responds with ciphertext, which you can safely store in your database or elsewhere. This separation of concerns keeps your application logic simple while offloading the complexity and risk of encryption to Vault. To encrypt, you’ll pass your plaintext as base64-encoded input along with the key name, and Vault will return an encrypted value you can store with confidence.
vault write transit/encrypt/my-encryption-key \
  plaintext=$(echo -n "MySecretMessage" | base64)
Explanation:
- Vault expects
plaintextas base64-encoded string. - The encrypted result will be returned as
ciphertext.
Example output:
{
  "data": {
    "ciphertext": "vault:v1:IoCzjV..."
  }
}
Decrypting Data
Decrypting is just as straightforward as encrypting—Vault handles the heavy lifting for you. When you need to retrieve and use your data, simply send the previously encrypted ciphertext back to Vault, along with the name of the encryption key used. Vault will verify the request, decrypt the data, and return the original plaintext (base64-encoded). Since Vault doesn't store your data, only the encryption keys, this keeps your system lightweight and secure.
vault write transit/decrypt/my-encryption-key \
  ciphertext="vault:v1:IoCzjV..."
Output:
{
  "data": {
    "plaintext": "TXlTZWNyZXRNZXNzYWdl"
  }
}
Decode the base64 output:
echo "TXlTZWNyZXRNZXNzYWdl" | base64 -d
Output:
MySecretMessage
Key Rotation
Key rotation is one of the most powerful features of Vault’s Transit engine. Over time, rotating your encryption keys enhances security by limiting the exposure window of any single key. Vault makes this process painless. When you rotate a key, it generates a new version but retains the old ones for decrypting existing data—so nothing breaks. Your app doesn’t need to re-encrypt older data unless you explicitly want to rewrap it with the latest key version. This versioned approach gives you the flexibility to keep things secure without disrupting your workflows. And yes, all key versioning and rotation history is fully auditable.
Use below command to rotate your key
vault write -f transit/keys/my-encryption-key/rotate
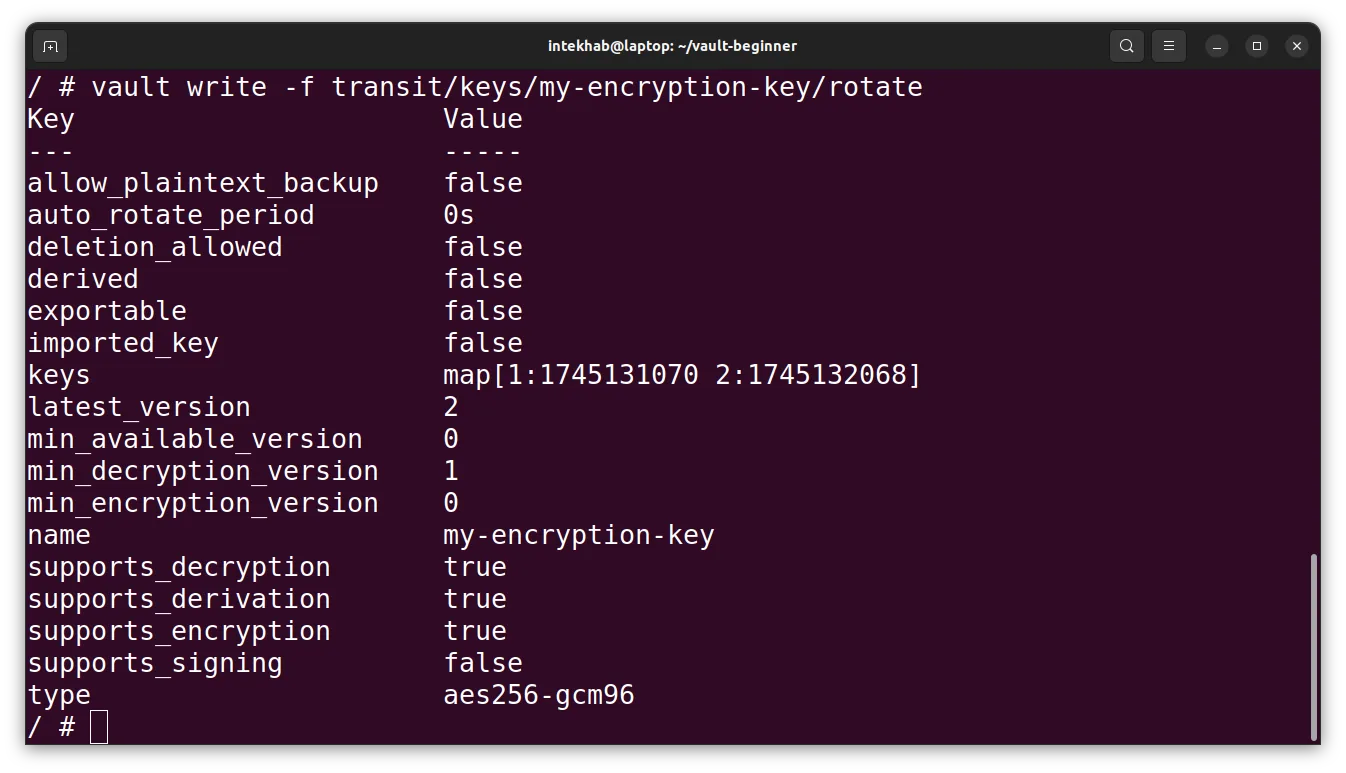
In the output, take note of the `latest_version` field—it should now show the value `2`. This means Vault has generated a second version of the key for that path. From this point on, all new encryption operations will use version 2 by default, while Vault will still retain the previous version(s) to support decryption of older data.
When you rotate a key in Vault, previously encrypted data doesn’t become obsolete or unreadable. Vault keeps all older key versions so it can still decrypt any data encrypted using those earlier versions. For example, if your data was encrypted with key version 1, Vault will automatically detect that and use the right key version to decrypt it—even after a rotation.
You might have noticed the encrypted string begins with a prefix like vault:v1:. This is Vault’s way of tagging the encryption version used for that data. The v1 part indicates that version 1 of the key was used during encryption. This prefix helps Vault determine which version of the key to use when decrypting, ensuring everything stays consistent and backwards-compatible.
Absolutely. Here's a refined, instructional book-style version of that explanation:
Step 7: Creating a Transit Key for Digital Signatures
Not all keys are meant for encryption and decryption. In many systems, data integrity and authenticity are just as important—sometimes even more so. Vault supports this through the use of signing keys, and for that purpose, it provides support for asymmetric key types such as ed25519.
The ed25519 key type does not support encryption or decryption. Instead, it is designed specifically for signing operations. When you use an ed25519 key with the Transit secrets engine, Vault enables your applications to sign arbitrary data. This allows external systems or services to later verify the signature using a public key, confirming both the origin of the message and that its contents have not been altered.
This is particularly useful in scenarios where you need to:
- Sign structured data such as tokens or audit events.
- Generate digital signatures for messages or payloads.
- Prove the origin of a request in distributed systems.
- Integrate with clients or services that require signature-based verification.
The private signing key never leaves Vault. Signing operations are performed securely within the Vault server, minimizing the risk of key exposure. Vault can also expose the corresponding public key, which can be distributed safely to clients for verification purposes.
In short, if your goal is to prove who sent the data and that it wasn’t modified, rather than to encrypt or decrypt it, you should use a key type such as ed25519. This ensures cryptographic assurance of authenticity, backed by the secure storage and controlled access that Vault provides.
We’ll now proceed to create an ed25519 key and use it to sign and verify data.
Execute the below command to start the creation of the signing key.
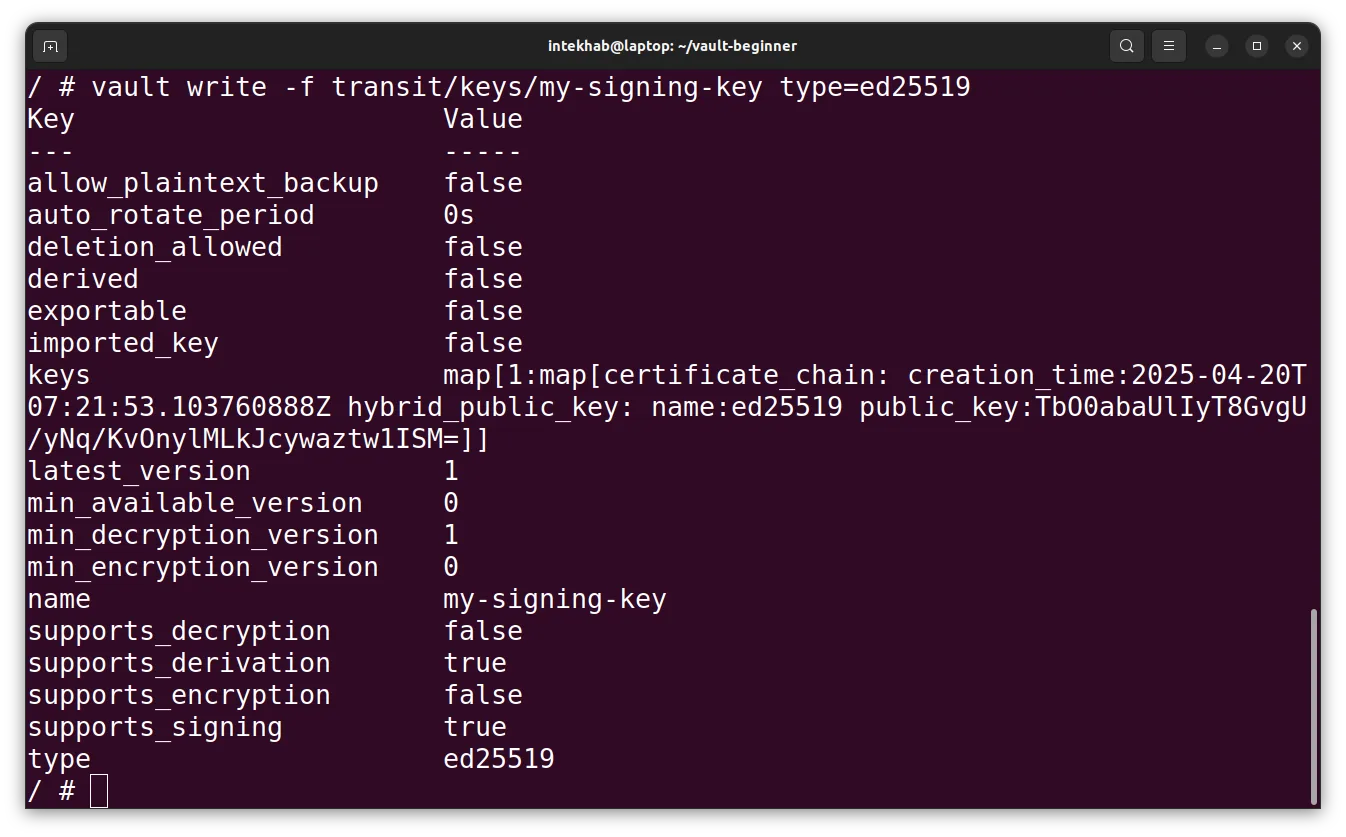
vault write -f transit/keys/my-signing-key type=ed25519
In this example, we're creating a new key named my-signing-key with the type set to ed25519. The output would be like below.
Now that we have a signing key ready, let’s walk through how to use it for digital signing and verification.
Signing Data
Signing data using Vault’s Transit engine allows you to generate a cryptographic signature for a piece of data without ever exposing the private key. It’s ideal when you need to verify the integrity or authenticity of a message, payload, or file.
Before sending your data to Vault, it must be base64-encoded, Vault expects the input in that format to ensure safe transport over the API.
Once encoded, you pass it to the Transit engine, and Vault returns a cryptographic signature. This way, your private keys stay securely tucked away inside Vault, and your application can confidently validate signed data without ever needing direct access to the keys.
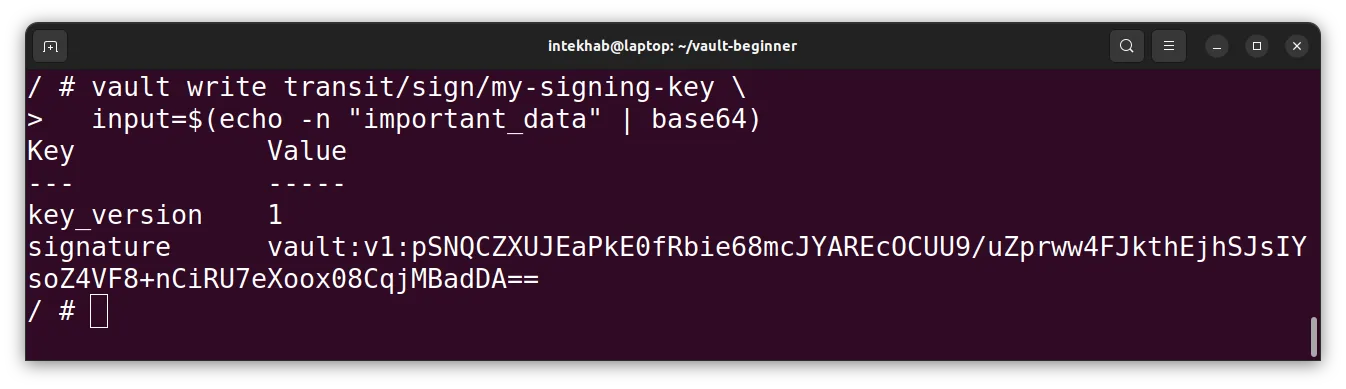
Run the below command to sign your data
vault write transit/sign/my-signing-key \
  input=$(echo -n "important_data" | base64)
You’ll get a signature like:
Once data has been signed using a Vault Transit key—such as one created with type=ed25519 you can verify the authenticity of that signature using the transit/verify endpoint. This step is crucial when you want to ensure that the data has not been tampered with and that it was indeed signed using a trusted key.
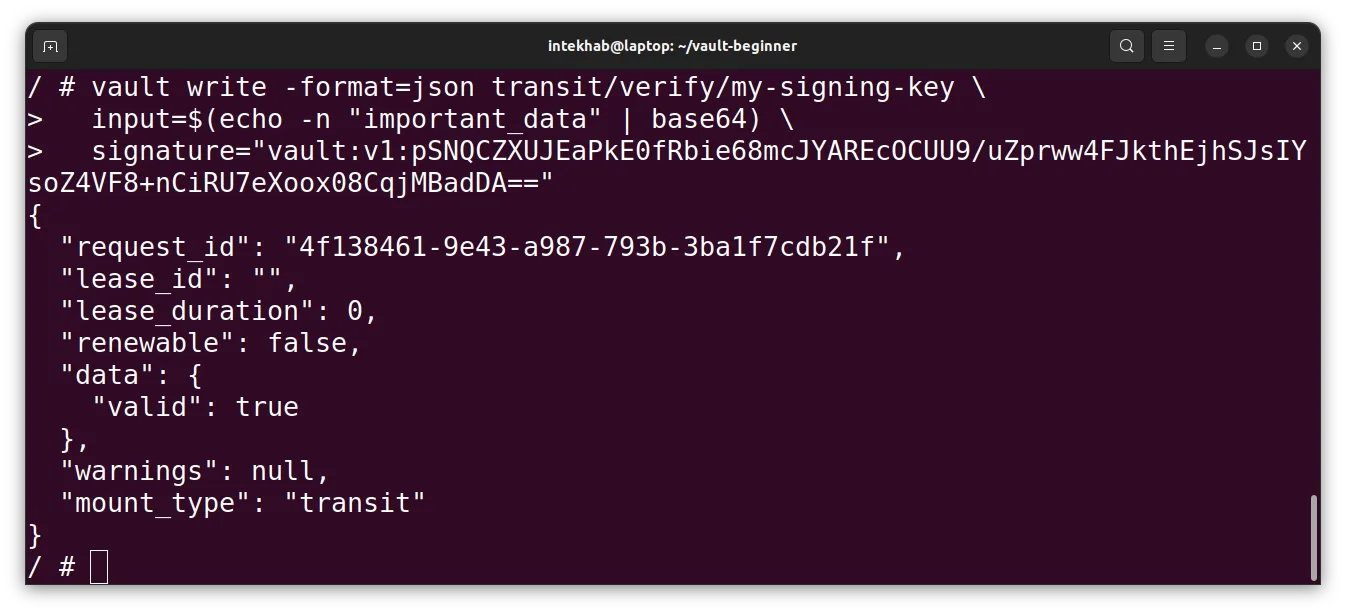
During verification, Vault takes the original input data and the provided signature and checks if they match using the corresponding public key. If the signature is valid, Vault responds with valid: true, giving you confidence in both the integrity and origin of the data.
Just like signing, the input data must be base64-encoded before sending it to the API. This process is often used in multi-service systems to verify tokens, messages, or sensitive payloads where security and trust are critical.
Run the below command to verify the signature
vault write -format=json transit/verify/my-signing-key \
  input=$(echo -n "important_data" | base64) \
  signature="vault:v1:pSNQC...."
This returns:
Step 8: Access Control with Policies
Throughout this chapter, we’ve seen how powerful the Transit Secrets Engine can be. We've created encryption keys, encrypted and decrypted data, rotated those keys, signed payloads, and verified signatures. Each of these operations—while technically simple—must be strictly governed, especially in production environments where multiple services interact with Vault.
This is where Vault policies come in.
Vault doesn’t just assume a service should be able to use a key simply because it exists. Instead, every capability encrypt, decrypt, sign, verify, rotate—is exposed through a specific API endpoint. And access to each of these endpoints must be explicitly allowed via policy.
Let’s connect this to what we’ve done so far:
- When we used the key to encrypt data, Vault hit the endpoint
transit/encrypt/my-encryption-key. To allow this action, a policy must include a rule grantingupdatecapability on that path. - For decryption, we used
transit/decrypt/my-encryption-key, which again requires its ownupdatepermission. - When we rotated the key version using
transit/keys/my-encryption-key/rotate, that operation neededupdateaccess on a different path. - Similarly, signing with an
ed25519key involved callingtransit/sign/my-signing-key, and verifying usedtransit/verify/my-signing-key.
In essence, Vault policies let you segment access by operation and by key. This allows you to:
- Give encryption-only access to applications that store data.
- Restrict decryption access to backend services that process sensitive data.
- Allow signing operations only to systems that produce tokens or messages.
- Let verification be publicly accessible if needed, without exposing the signing key.
This separation is not just best practice—it’s vital. If an encrypt-only service is compromised, an attacker can’t decrypt data, rotate the key, or sign payloads. It’s one of Vault’s most powerful security principles: zero privilege without explicit permission.
So, as you build policies for your applications, think in terms of roles and responsibilities. Who needs to encrypt? Who should decrypt? Who’s allowed to rotate or sign? Define these in separate policies, assign them to specific roles, and let Vault enforce the boundaries.
By combining Transit’s features with carefully scoped policies, you’re not just managing secrets—you’re doing it securely, at scale, and with confidence.
Example Policies for Transit Secret Engine
Below are some of the policies you can consider as your starting point. These are designed to reflect the different operations we've performed throughout the chapter and can be tailored based on your application’s trust boundaries.
1. Encrypt-Only Policy
This policy allows services to encrypt data, but not decrypt it—ideal for write-only workflows like logging or form submissions.
path "transit/encrypt/my-encryption-key" {
  capabilities = ["update"]
}
2. Decrypt-Only Policy
Useful for backend processors that need to read and handle encrypted data but shouldn’t create or rotate keys.
path "transit/decrypt/my-encryption-key" {
  capabilities = ["update"]
}
3. Key Rotation Policy
This policy allows only specific users or automated maintenance tools to rotate keys.
path "transit/keys/my-encryption-key/rotate" {
  capabilities = ["update"]
}
4. Sign-Only Policy
Grants permission to sign payloads with a specific key. This is useful for token generators or internal services creating signed data.
path "transit/sign/my-signing-key" {
  capabilities = ["update"]
}
5. Verify-Only Policy
Perfect for public-facing or cross-service verification flows. You can safely distribute this policy to services that need to confirm authenticity but not sign or modify data.
path "transit/verify/my-signing-key" {
  capabilities = ["update"]
}
6. Full Admin Policy for a Key
If you’re building a superuser role (use with caution), this gives full control over a single key, including its deletion.
path "transit/keys/my-encryption-key" {
  capabilities = ["create", "read", "update", "delete", "list"]
}
These examples are just the starting point. Depending on how your infrastructure is structured, you can mix, match, and scope policies down even further. Vault’s flexibility with path-based access control gives you full power to enforce least privilege—down to a single action on a single key.
Real-World Use Cases
- Credit Card Encryption
Encrypt card numbers before storing in database. - Tokenization
Use encryption + encoding to create tokens from sensitive values. - Secrets-as-a-Service
Let internal tools ask Vault to encrypt and decrypt sensitive configs. - Digital Signatures
Sign data without sharing private keys across services.
Optional - To List Keys
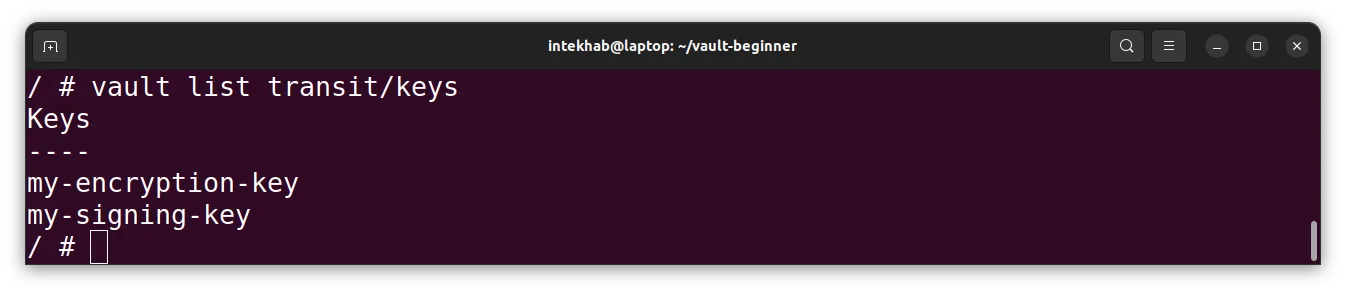
Once you've started creating encryption keys in the Transit engine, you might want to check which keys are available. Vault makes this easy. You can list all the keys stored in the Transit engine using a simple vault list command. This gives you an overview of all active keys managed by Vault—useful for audits, housekeeping, or just keeping track of what's in play.
Run command:
vault list transit/keys
the output would be like below.
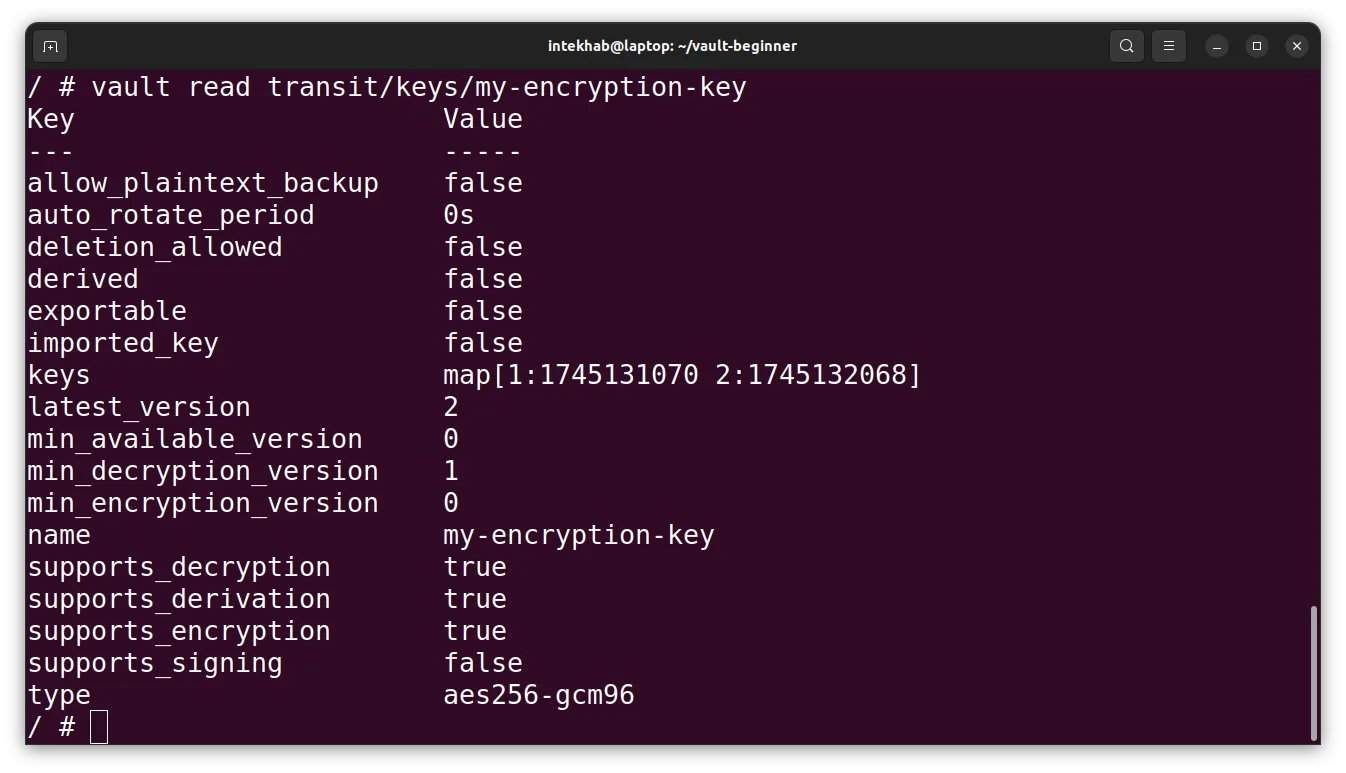
Need to know more about a specific key—like its type, creation time, or the number of key versions? Use the vault read command to fetch the key’s metadata. This shows you critical information including whether the key supports deletion, whether it's set to auto-rotate, and more. It’s especially handy for understanding key lifecycle and verifying that everything’s configured as expected.
Run command:
vault read transit/keys/my-encryption-key
The output would be like below.
Vault’s Transit engine is a powerful way to perform cryptographic operations without exposing or managing raw keys. It decouples your app from key management complexity while offering fine-grained control and auditing.