Chapter 3 / 28
Vault Initialization and Logging In
HashiCorp Vault For Beginners6 min read
Now that Vault is installed and running locally using Docker, it’s time to bring it to life.
In this chapter, we’ll introduce the vault operator init and vault login commands. You’ll learn what it means to initialize Vault, how to unseal it, and how to authenticate. We’ll also briefly touch on Vault tokens — what they are and why they matter — without diving too deep (we’ll explore them fully in a later chapter).
Wait, Why Does Vault Need to Be “Initialized”?
When Vault starts up for the first time, it’s in a sealed state — think of it like a locked box with a self-destruct mechanism on the inside. Before anyone can use it, Vault must be initialized and unsealed.
Why? Because Vault doesn’t want to take chances. It protects your secrets with an encryption key that doesn’t exist until you run vault operator init. That command generates the cryptographic foundation Vault needs to operate — including the keys to unlock its secrets.
Once initialized, you can authenticate using a token, Vault’s way of saying, “Yes, you have permission.”
Sure! Here's a clearer and more professional rewrite of that sentence:
Before you begin: Ensure you have completed all steps in Chapter 2 and are still connected to the Vault container. If not, please revisit and execute the setup commands from that chapter first — all commands in this section must be run from inside the Vault container shell.
Step 1: Initialize Vault
Run this command in your terminal:
vault operator init
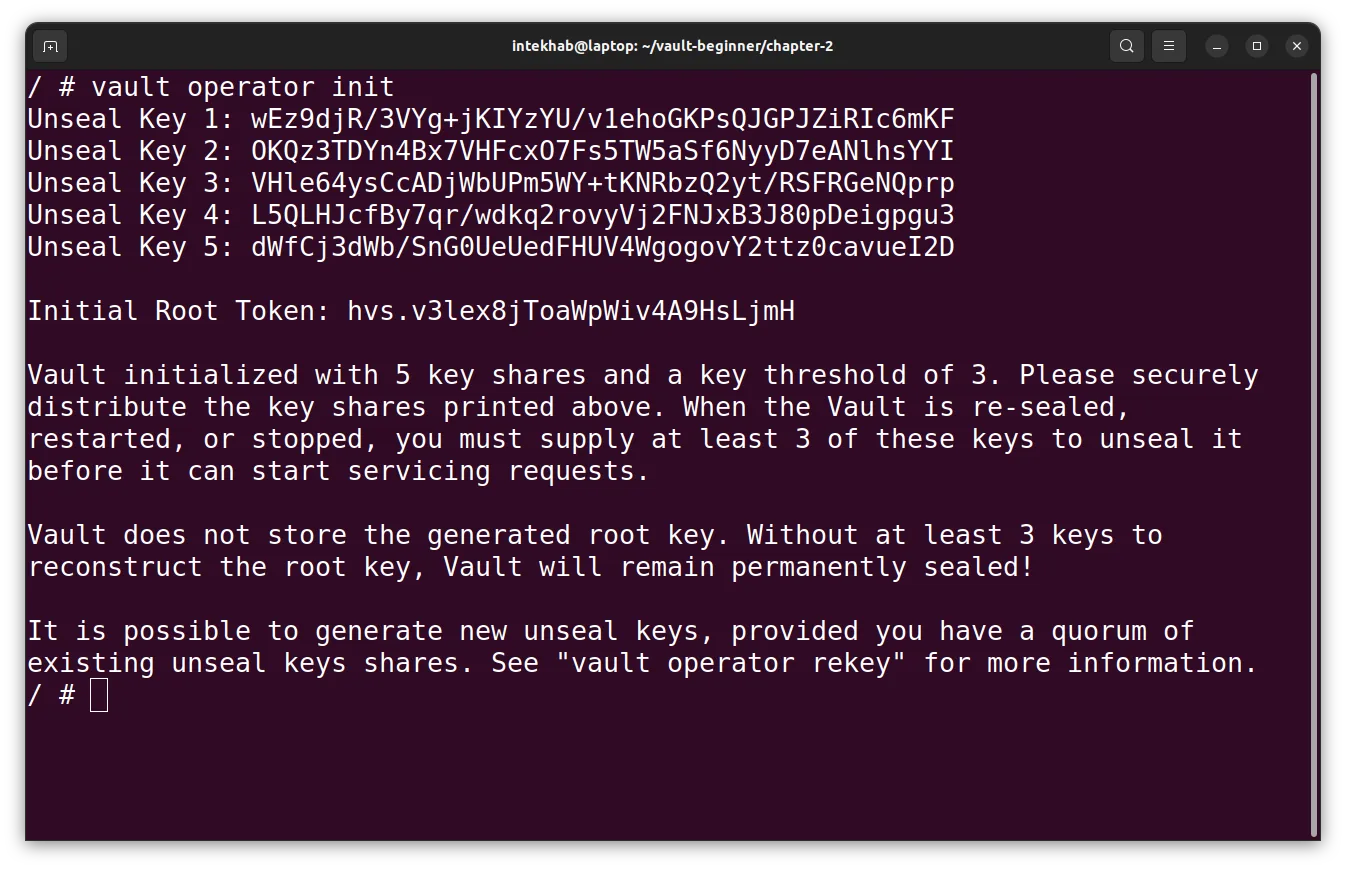
You’ll see output that looks like this:
Don’t Forget: Make sure to securely save the unseal keys and root token—you’ll need them throughout this book. If you lose them, you’ll have to delete the
vault-datafolder and reinitialize Vault from scratch.
Vault uses a mechanism called Shamir’s Secret Sharing to generate multiple unseal keys. These keys are required to “unlock” the vault. By default, Vault requires at least 3 of the 5 unseal keys to unseal it.
Yes, it’s paranoid — in a good way.
Step 2: Unsealing the Vault
To unseal Vault, run this command three times using three of the unseal keys:
vault operator unseal
Paste one key at a time when prompted.
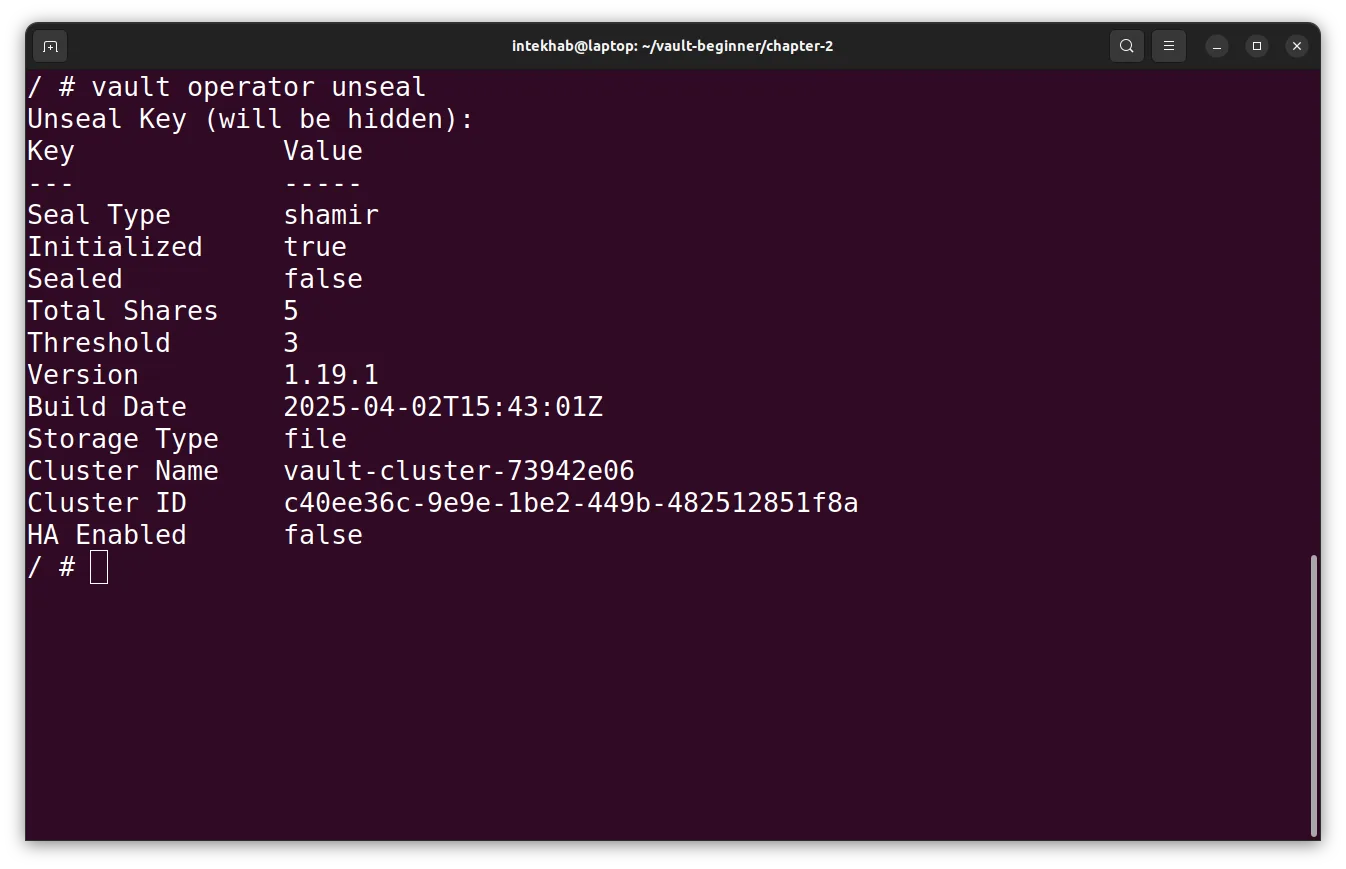
After the third key, Vault becomes unsealed and ready for use.
Step 3: Logging In
Once Vault is initialized and unsealed, you need to authenticate.
Use the root token generated during initialization:
vault login hvs.abc123xyz456
(Replace s.abc123xyz456 with your actual root token you have received when you performed the vault operator init.)
If everything goes well, you’ll see:
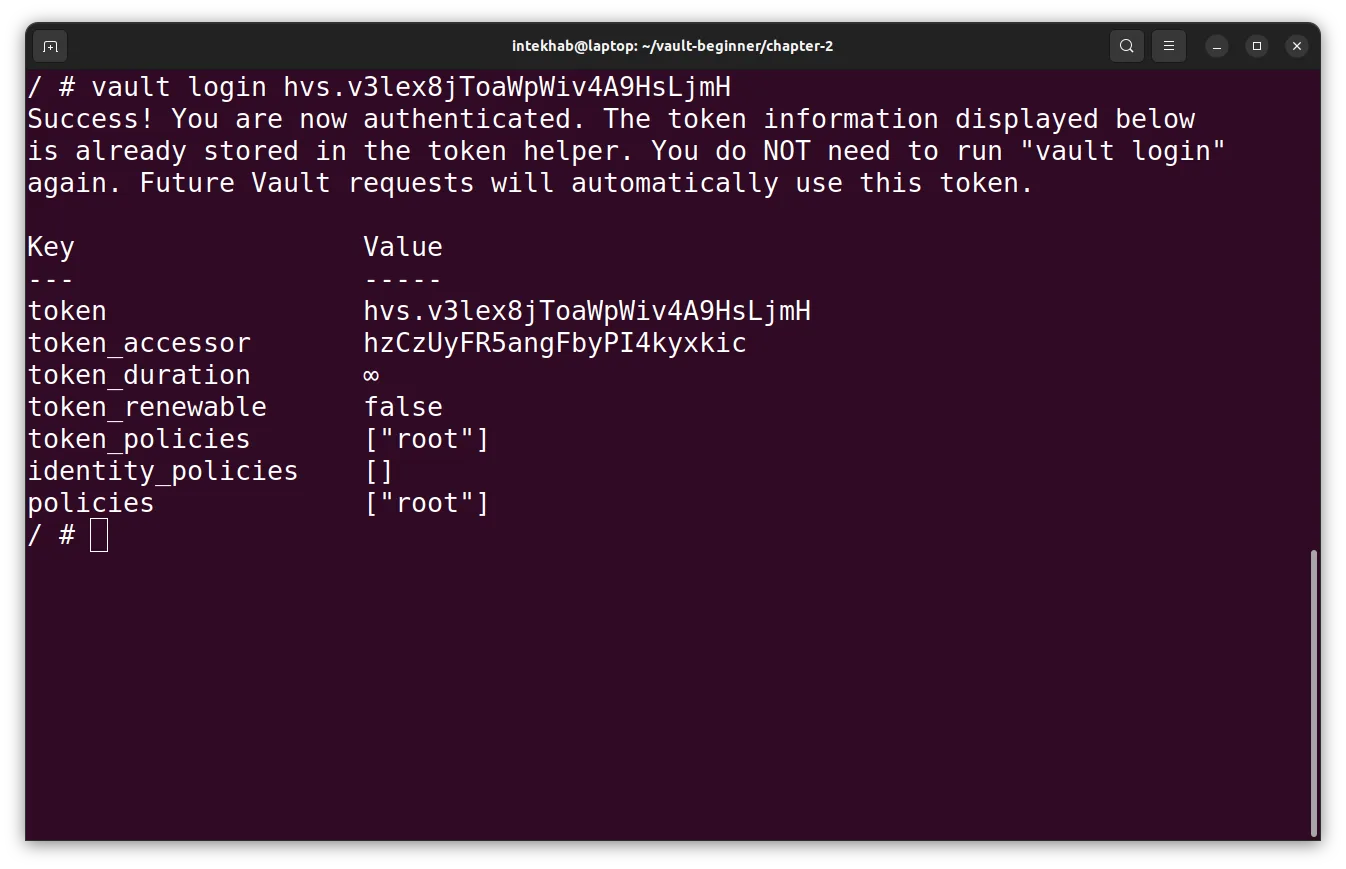
You’re in.
A Quick Word About Tokens
When you log in to Vault, you get a token — a little digital passport that proves who you are and what you're allowed to do.
Tokens are central to how Vault handles identity and access. There are root tokens (all-access), regular tokens (limited access), renewable tokens (for long-lived services), and more. You can revoke them, rotate them, and restrict them — and yes, we’ll dive into all of that in a dedicated chapter later.
But for now, just remember this:
No token, no entry.
Recap
- You initialized Vault using
vault operator init. - You unsealed it with three out of five unseal keys.
- You authenticated using the root token.
- And you got a first glimpse into Vault’s token-based access control.
From here on, you’re ready to start interacting with Vault — storing secrets, configuring access, and building secure workflows.